Showing posts with label Kids Bible Study. Show all posts

Thursday, November 17, 2022

Crafts: Purposeful Living – Bring a Light into Your Home

 A Mom's Quest to Teach logo: Crafts: Purposeful Living – Bring a Light into Your Home; background photo of lighted, strung lightbulbs

This post contains affiliate links. For more information, please see my Terms of Use and Disclosure Policy page. Thank you.

I have been sharing crafts and activities that I designed and created for The Canadian Schoolhouse's Virtual Family Retreat: A Purposeful Life. If you are homeschooling, this is a wonderful virtual retreat for you! From devotionals focused upon the Bible verses that inspired these crafts and activities to special guest speakers, there is something for everyone. 

The focus of the retreat this year has been living a purposeful life. So, how can we be more purposeful in our lives? How can we remember that God will be there to guide us? 

Let's look at today's Bible Verse, and then I will share about two different crafts we can make to help us remember these things and the verse.

Your word is a lamp to my feet and a light to my path. Psalm 119:105 ESV

Today, we can make two different versions of the same craft. We can make it so our craft looks like a light bulb or an oil lamp. 


Get your materials; coffee filter, pencil, markers, spray bottle


Materials 


You will need at least one coffee filter (two, if you want to make both versions of the craft), a pencil, markers, a spray bottle for water, scrap paper (the markers will bleed through the coffee filter), and – for displaying your artwork – tape.


Steps 


1. You can either sketch your picture using a pencil and then draw it with markers or you can go straight to the markers. I took inspiration for my light bulb from a piece of clip art online. You can be as creative as you want. 

2. I recommend you color the entire picture in because you want to make sure that there is plenty of ink from the markers for the final step in the craft project. 

You can use the traditional colors for the light bulb or pick out others that will complement the room where you will hang your sun catcher when you are finished. 


A Mom's Quest to Teach logo; light bulb drawn on coffee filter


When I drew my oil lamp, I started with the markers. I wanted to leave enough room for the cup and the flame. 

At the top and bottom of my picture, I wrote out Psalm 119:105 along with the month and year. You could write out the entire Bible verse if you leave enough room. BUT...I recommend saving the writing for after you use the spray bottle. 

3. You want to spray the coffee filter with water from your spray bottle. The coffee filter should be wet but not soaking wet. Do this over a piece of scrap paper. The ink from the markers will run. You want to make sure you spray where you want the ink to spread but NOT where you don't want it to spread. 


A Mom's Quest to Teach logo: spraying water onto lamp drawn on coffee filter


4. After my pictures were dry, I was able to add a few more touches. When my oil lamp picture was done, I needed to add a few lines for definition. I simply used the same markers and drew the shape I wanted to see. I also tried to fix November 2022 but it didn't turn out as neat as I wanted. But that is okay...because crafting, art, etc. is not always perfect. It is all a learning experience. 

5. When you are done (and the coffee filters are dry), you can hang them in your window. 


A Mom's Quest to Teach logo: Crafts: Purposeful Living – Bring a Light into Your Home - light bulb on coffee filter hanging in window


If you want to make sure they last for years, you can laminate them. I've done that in the past with pumpkins and snowflakes we created, and they are so nice in our windows year after year. 

Depending on how much sun the window gets, your artwork may fade over time. But that is okay because you can make more! 

Where will you hang your finished artwork? 


Monday, February 10, 2020

Teaching the Old Testament to Children: Review of What God is Doing

A Mom's Quest to Teach (logo); Book Club: What God is Doing: Old Testament Object Lessons for Kids by Anne Marie Gosnell; book cover; Future Flying Saucers logo

Disclaimer: I received a FREE PDF copy of this book from the author in exchange for my honest opinion. I was not required to write a positive review nor was I compensated in any other way. This post contains affiliate links. For more information, please see my Terms of Use and Disclosure Policy page. Thank you.

I had the privilege of receiving a PDF of What God is Doing: Old Testament Object Lessons for Kids by Anne Marie Gosnell to review with our family. I have previously read and reviewed Helping Your Children Become Prayer Warriors and also enjoyed watching the explanation of Bible object lessons on the YouTube page, "Bible Object Lessons for Kids." I have wanted to try some of these with our own children. So, having access to the text of What God is Doing was a fantastic opportunity for me.

What Can You Find in What God is Doing?


There are 25 interactive lessons geared towards children ages 5 to 12 in What God is Doing: Old Testament Object Lessons for Kids. Anne Marie Gosnell wrote each lesson to take about 20-30 minutes with one main goal in mind: to show how God is bringing about His plan of salvation. From examining the experiences of Adam and Eve in Eden to Nehemiah building the wall, the main focus of this curriculum is the Old Testament as you may have already gathered from the subtitle (Old Testament Object Lessons for Kids). There are two lessons at the end of What God is Doing which address the time that elapsed between the Old and New Testaments (between Malachi and the birth of Jesus) which bring a nice conclusion to the book.

In addition to the 25 object lessons, there are a number of other chapters to help you get the most of What God is Doing. For example, there is an introduction, a chapter on how the book works with links to resource pages, tips and advice on how to become an excellent Bible teacher, and coloring pages for you and your children.

Book Club: Book Review; What God is Doing book cover

Each lesson contains the following elements:

  • Scripture Focus
  • Materials
  • Geography
  • Background 
  • The Object Lesson itself
  • The Bible Lesson
  • A Life Application 
  • A Comment Box for the teacher to answer the questions "What went well as you taught this lesson? What can you do better?" 


Quote from What God is Doing by Anne Marie Gosnell: "Fear. You cannot see it, but you can surely see the effects of it." In one of 25 object lessons, shown children how God is with us wherever we go.

How Did We Use What God is Doing: Old Testament Object Lessons for Kids


During the time we were reviewing this thorough book, we took a look at a few lessons. Specifically, I would like to talk about our experiences with Lesson 7: Abraham's Challenge to Sacrifice Isaac and Lesson 9: Jacob Wrestles with God. As we have the PDF of the book, I printed out the pages necessary to read ahead of time as well as the black and white image that accompanies the lesson (for our children to color).

We actually took a look at Jacob Wrestles with God first because I knew that our daughter would really enjoy the focal point of the object lesson. In this lesson, we made oobleck. We have never made this before in our homeschool, so I knew this would be a memorable experience for them. Our daughter really enjoyed helping me prepare the oobleck while our son colored in the picture. This was really a wonderful piece to include in the lesson to teach about how we often have hard hearts when we encounter God (like the solid nature of the oobleck) but "in God's hand we become usable, flexible, and able to glorify God" (59).

empty container, measuring cup, cornstarch, Jacob Wrestles with God lesson plan
Getting the materials together for the object lesson.

coloring picture that accompanies Jacob Wrestles with God

oobleck
The oobleck was hard when punched but soft if you rested your hand on it.


The second lesson I would like to share is that of Abraham's Challenge to Sacrifice Isaac. The materials for this lesson were quite simple to gather: a small model or picture of a ram and several colors of construction paper. We read about the promise given to Abram and Sarai and their name changes, compared the story of Isaac to that of Jesus, and looked through the wordless picture book I created with the construction paper.

Lesson plan page; yellow construction paper


After we used some of the lessons from What God is Doing: Old Testament Object Lessons for Kids, we were able to tie it back into our son's language arts where we are reading excerpts from the Bible and writing sentences about them. We also were able to find videos of the stories we read to watch during lunchtime. So, the lessons in the book fit in perfectly with our homeschooling day. 

What do I Think?


This is a tremendously well-organized book with lots of great information! This book would be good for homeschooling families or those who are Bible teachers or Sunday School teachers. There are lessons that require more than a couple of children but they can be easily adapted, if necessary.

There are resources available including video links for a few of the lessons and the posters are available to either purchase or download as individual posters. This is quite helpful when planning out the lesson.

I also like that in most cases the materials necessary for the lessons are quite easy to gather together. There are only a few that require a trip to the store—like if you don't have toy plastic insects for the lesson on the twelve spies and the wandering or the cornstarch needed for the lesson about Jacob wrestling with God.

I also like how Anne Marie Gosnell helps us teach our children difficult lessons from the Bible in simple ways, including ways to apply the information to their own lives. For example, in the lesson regarding Anointed King David, children learn about how God sees inside our heart. Even if the outside looks good, the inside might not be good. A chocolate candy box and a clear candy jar are used in the lesson and the life application portion reminds children that God can see through us just like we can see through the clear jar.

What God is Doing book cover; two coloring pages; A Mom's Quest to Teach logo


Finally, I especially liked how using the lessons from What God is Doing: Old Testament Object Lessons for Kids allowed our children to demonstrate the knowledge they had previously learned from homeschooling and Sunday School. When asking one of the questions from Abraham's Challenge to Sacrifice Issac ("What do we know about sheep and the Old Testament?"), my children were able to discuss how David protected sheep (from lions and bears) prior to his fighting Goliath. Our son also shared a modified version of the parable of The Lost Sheep—of how the shepherd goes after the one sheep that runs away. They also recalled a new version of a song they were learning about Father Abraham at Sunday School. All of these connections to homeschooling and church combined are why I can easily and enthusiastically recommend What God is Doing: Old Testament Object Lessons for Kids by Anne Marie Gosnell.

Future Flying Saucers logo

Would You Like to Learn More about Anne Marie Gosnell? 


Monday, July 9, 2018

Reviewing Bible Study Guide for All Ages (Beginner 3-K)

Cover of Student Pages of Bible Study Guide for All Ages


Opening Bible Study for All Ages box
Our son was so excited when the box arrived!
I received a complementary product through the Homeschool Review Crew in return for my honest opinion. 

Our family was very excited to have the opportunity to review the Bible Study Guide for All Ages since both of our younger children (who are three and five) would be able to use the same lessons – Beginner (3-K). We have been using the Beginner Level Student Pages and the Beginner Time Line for the past several weeks and I have been enjoying the time that we are spending together as a family working on our lessons.

On the reverse of the Student Pages cover are quick teacher instructions. They outline materials needed and an overview for each of the sections of the Student Pages. In addition to general information about how to use the Student Pages, it also offers tips for how to bring one's own Bible into the lessons during the reading of the Bible verse and during My Bible section. I have found rereading these quick teacher instructions periodically is helpful in making sure I stay on the right track with the lessons.

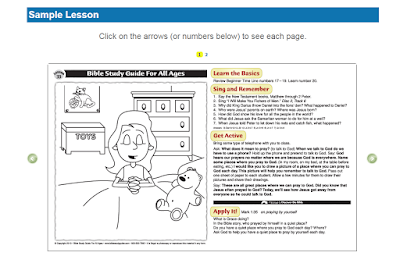
Each of the Beginner Level Student Pages is divided into five parts:

Bible Study Guide for All Ages sample page

  • Learn the Basics
    • Use and Review the Beginner Time Line (these are beautifully illustrated!) 
  • Sing and Remember 
    • Series of questions and references to the Children's Songs CD set (which we do not own) 
  • Get Active or My Bible
    • In Get Active, children will work on the concepts of the lesson through examples and activities 
    • In My Bible, children will become familiar with their own Bible 
  • Discover the Bible 
    • Children listen to the Bible story and lesson as we read each numbered paragraph
    • Our children then color, trace, or mark each illustration in the suggested manner 
  • Apply it! 
    • Our children now have the opportunity to apply the lesson to their own lives through answering questions and coloring the large picture 
Bible Study Guide for All Ages student pages
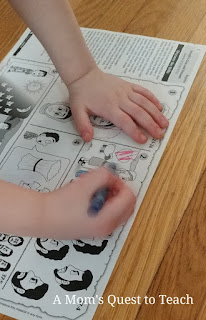
We usually complete our Student Pages while sitting on the floor together.

There is a great video on Bible Study Guide for All Ages that goes through Beginner Level Student Pages. You can view it here! 

Bible Study Guide for All Ages Beginner Time Line


My children and I love the Beginner Time Line cards (which are geared towards non-reading children ages 3 and up). The set of 34 cards are a perfect way for us to begin each lesson. My husband and I work with our two younger children on each lesson. While my husband reads over the "Get Active" section, I review the Beginner Time Line cards and the questions. Using the full-color, 8.5" x 11" flash cards enables me to ensure both our son and daughter have a chance to each participate.

Bible Study Guide for All Ages Beginner Time Line Joseph's Brothers

What We Love

  • There is a minimum of materials required. Most lessons merely need crayons and the student pages.
  • Occasionally items like happy and sad faces drawn on paper, a set of blocks, additional paper, or candy are called for.
  • Uses clear, easy to read text.
  • Positive images of boys and girls of all ethnic and racial backgrounds 
  • "All ages can study the same text." 
The lessons are so easy to navigate and require so little preparation that we can use them at almost any time of our day. So far, the most preparation has been finding some images for children to try and memorize, making cards with happy and sad faces, and finding the appropriate crayons to color in the lesson.

Bible Study Guide for All Ages student page

The first 14 lessons focus upon Joseph from the Old Testament. Our children knew the story of Jacob, his sons, and their experiences very well by the time we were about halfway through the lessons. The next lessons address the story of Daniel, Shadrach, Meschach, Abednego, Nebuchadnezzar, the genealogy of Jesus, birth of Jesus, birth of John the Baptist, and closes with Jesus' youth.

Bible Study Guide for All Ages student pageIn the first two sections – Learn the Basics and Sing and Remember – children can practice their memory skills. Each time we go over the Beginner Time Line, our younger daughter remembers more facts about the Bible. And when we review the questions pertaining to the books of the New Testament, I find our son is remembering all of the books the more we recite them.

My favorite part of the lessons has to be Discover the Bible. I love reading through the information and helping my children color the illustrations as we talk about the story of Joseph from the Old Testament. For example, in lesson 10, students see Joseph revealing his identity to his brothers. To help children understand how Joseph and his brothers felt, the illustrations show them crying in different boxes on the Discover the Bible page. I also love the fact that the lesson lists the name of each brother as they return home. This is just another instance where children can work on memorization.

Bible Study Guide for All Ages student page

After we complete lessons 1-26, I am sure we will be continuing with the next set (lessons 27-52) because I loved that both of our children can work together. And with using the Bible Study Guide for All Ages, our children will be able to study the entire Bible in 416 lessons. Each year, they will study some lessons from the Old Testament and some from the New Testament. And when they grow out of the Beginner (3-K) level, we can simply move to the next level – continuing along the progression of 416 lessons. 


For more information, please visit:


There are several other levels that the Homeschool Review Crew is reviewing including:
  • Primary (1st & 2nd Grade) 
  • Intermediate (3rd & 4th Grade) 
  • Advanced (5th & 6th Grade)
And some of the Homeschool Review Crew is reviewing the Wall Maps and Timeline! The maps and timeline look like fantastic resources that our children will be able to use in the near future.