Friday, January 27, 2017

Book Club: Fun and Learning with Joseph Had a Little Overcoat

Image of book jacket of Joseph Had a Little Overcoat


This post contains affiliate links. For more information please see my Terms of Use and Disclosure Policy page. Thank you.


clipart of children from Dreamstime Stock Photos

We have been faithfully go to the library every two weeks since before Thanksgiving.  My toddlers love it and I am also enjoying the journey back to reading.

Each month my son will choose two to six books to borrow from the library.  I try to steer him towards books we do not own and at least one book each trip that his sister will also be able to read (i.e. board books).

I selected two of the books during our second visit in January 2017: Joseph Had a Little Overcoat by Simms Taback and Groundhog stays up late by Margery Cuyler.

Story


Joseph Had a Little Overcoat is adapted from a Yiddish folk song and set in Poland.  Joseph's overcoat gets worn, so he turns into various articles of clothing until it becomes nothing.  The moral: You can always make something out of nothing.

The work of Taback is "colorful and antic and silly, and it's studded with little visual treats and hidden surprises." (Ingall, Majorie. "Illustrious." Tablet Magazine N.p., 8 Feb 2011. Web 25 Jan 2017).

Teaching with Joseph Had a Little Overcoat 


History


A very straight forward way to use the book is to learn more about the song and the history of Poland (age appropriate for your child).


Arts & Crafts


There are many different ways to approach this book using arts and crafts.

  • Mixed Media - Your child can create their own artwork based upon the style of the book. 
  • Flip book of the articles as they change in size 
  • Weaving 
  • Fruits and Vegetables - I have listed below a few ideas but there are a multitude of craft options when using fruits and vegetables as a starting point.  Some of the ones depicted in the book are: watermelon, carrot, cucumber, potato, apple, squash, radish, corn, tomato, lettuce, and cabbage. 
  • Barnyard Animals - There are also a lot of options to for animals such as puppets, paper plates, etc.  Some of the animals depicted are: chickens, turkey, cat, dog, cow, horse. 
  • Flowers - There are different flowers depicted on several pages including roses, tulips and daisies.  
  • Sewing buttons - Your child can learn the basics of sewing or practice fine motor skills with buttons. 
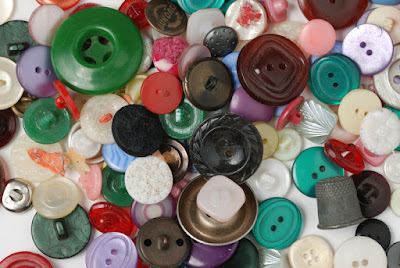
image of buttons from Dreamstime Stock Photos


Extension


As a family, one could collect gently worn clothes that are outgrown and donate them to a local shelter or church.

If sewing is possible, children could take worn clothing and turn it into something else.  They could cut it down to a smaller size for another member of the family.  Or the clothing could be turned into an apron or plush animal.

Make a list of the fruits and vegetables depicted in the book.  When shopping, you and your children can pick out the fruits and vegetables you wrote down to prepare at home.


Recycling


This book also offers the perfect opportunity to talk about reusing items and recycling items.


Resources and Ideas 


Live Oak Media Activity Guide (Materials)

PBS Kids Cornerstones Building Blocks of Literacy (Materials)

The Book Fairy Blog (Book Review)

The Artful Parent (Mixed Media)

Art Bar Blog A Happy Place (Weaving with Kids)

Pigs Do Fly (Veggie Stick Puppets)

Kroger's Kindergarten (What's Growing in Your Garden)


Our family loves sharing ideas to accompany your favorite books from flamingo teachers to mice astronauts there are so many ways to use books in your homeschool. 


Tuesday, January 10, 2017

Parties – Pollyanna 2016

Christmas Decorations

This post contains affiliate links. For more information please see my Terms of Use and Disclosure Policy page. Thank you.

My husband's family holds an annual Pollyanna party each December in which my in-laws and his sisters and brother-in-laws exchange gifts.  Everyone who is able to attend in the family (children, grandchildren, nieces, nephews, etc) loves the good food and the good company.  This year was no exception to the excitement and fun we all shared together as an extended family.

Dinner


This year my Aunt prepared various appetizers and asked the family to bring either an appetizer to share or a dessert.

My husband and I decided to bring something kid friendly (and it turned out to be a hit with the grownups, too).

We made peanut butter and jelly sandwiches using four different types of jellies and jams.
Before adding the jelly and peanut butter we cut some of them into holiday shapes using cookies cutters.  (Any of the left over pieces of bread were saved so we could feed the animals.  You could also use them in various baking recipes as well.)

preparing sandwiches

PB & Jelly Sandwiches

PB & Jelly Sandwiches

We also prepared some applesauce and fruit cup containers to look festive. 

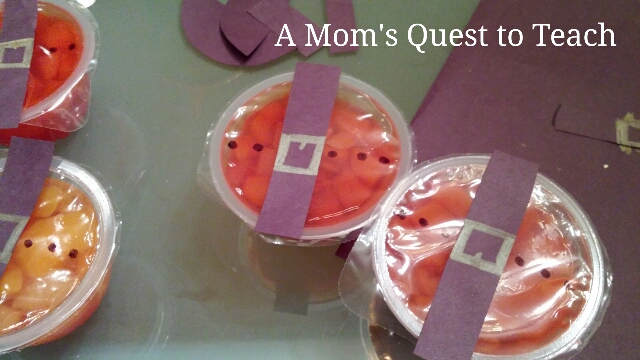
The fruit cups we turned into Santa using a black permanent marker, a gold metallic marker, and some black construction paper and glue.  My son helped me but the belts onto the fruit cups. 


Santa fruit cups


And we made reindeer out of the applesauce cups.  We glued on eyes, a nose, and taped on pipe cleaners for antlers.  We gave one a bow to be Clarice from the Rudolph television story. 


Reindeer applesauce w/o antlers


Reindeer Applesauce


There was also a Joyous veggie tray. 

Veggie Tray


My aunt prepared a meatball buffet (which included four different kinds of meatballs and sauces which included marinara, Swedish, buffalo, and sweet & sour.


Meatballs and bread

Meatballs


She also had a pierogi and kielbasa casserole and a Rustica Meat and cheese platter. 

Kielbasa

sandwiches

Another Aunt prepared a Pea Soup as well as bacon-wrapped sausages. 


Dessert


My aunt had different candies in beautiful jars on display (and for snacking).  We also had cakes and cookies for dessert baked and brought by aunts and a cousin.

Christmas Candies


Games


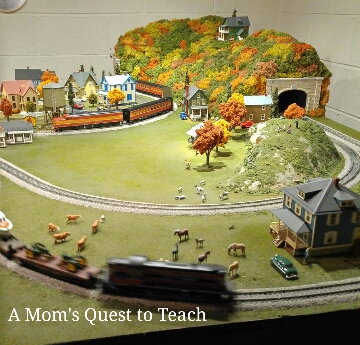
My uncle has several trains set up (around the Christmas tree upstairs) as well as several downstairs. My son was thrilled with them last year and even more so this year because he was allowed to blow the whistle for the train.

Train set


Gift Wrapping 


We wrapped two 'willing' teens for fun as well.  My step-son was wrapped by cousins and his grandparents while his cousin was wrapped by other family members.  Both were very nice to put up with our family's silly ideas of fun.

Wrapping the teen

Wrapping the teen


Crazy Sock Exchange 


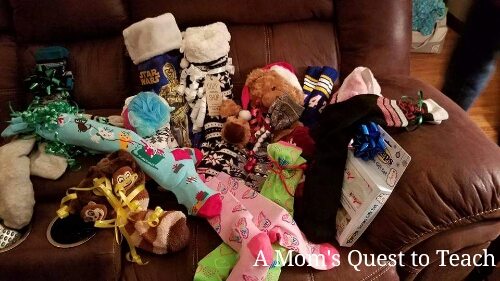
As a family, the adults participated in a sock exchange.  Each person who wanted to participate brought a pair of socks and filled them with various items (such as candy, gift cards, pens, etc.).  Then we all picked out a pair of socks.  

Crazy socks

After the exchange we tried on our new crazy socks!


Here are some ideas for your Holiday Party


Stockpiling Moms Christmas Sock Exchange 
Purex Sock Exchange Ideas 
Crafty Morning Reindeer Applesauce 
The Nerd's Wife 50 Winter Holiday Class Party Ideas 
Mil Dicas de Mae Santa's Fruit Cups 
Tiny Prints Christmas Party Games 
Women's Ministry Toolbox Christmas: Wrap It up Game 


Thursday, December 29, 2016

Crafts: Snowmen Milk Containers


This post contains affiliate links. For more information please see my Terms of Use and Disclosure Policy page. Thank you.

Materials 

  • milk container (plastic gallon or half gallon) 
  • craft foam 
  • scissors 
  • glue (I prefer to use a 'tacky' glue) 
  • lights (optional) 
snowmen on front step with lights

Steps 


1. Drink milk.

2. Wash out milk container and allow to completely dry.

3. Remove labels. (Sometimes it is easier to do this when the container is still wet.)

4. Create a template for eyes, a nose, and a mouth.

5. Cut pieces from foam.

6. Attach to milk container. 

Eyes on the snowman

gluing on the mouth of the snowman


completed snowman milk jug

Optional 


7. Cut out small hole on back near bottom for lights. 

cutting holes in milk containers for lights

8. String lights inside the snowman.

putting lights inside snowman milk jug


Safety Note: Be careful about leaving lights on inside your snowman to prevent any fires.


I made a few pieces to create a Frosty the Snowman and Mrs. Frosty for our front step.

To keep them in place, you could place rocks inside of them or tie them down.  I tied our three to the railing. 


Tuesday, December 27, 2016

Crafts: Snowflake Sun Catchers


This post contains affiliate links. For more information please see my Terms of Use and Disclosure Policy page. Thank you.

Materials 


Steps 

1. Gather all your materials.

2. Children draw on the coffee filters using markers.


3. Spray the coffee filters with water.

4. Allow to dry.

5. Cut out patterns to create snowflakes.


6. Laminate snowflake sun catchers. (optional)

7. Hang in windows.


I love how simple this craft is but that it also creates something beautiful to hang in the window all winter long.

My daughter tried out each marker on her hands prior to using it to color the coffee filter.


My son and daughter had already done a similar craft with coffee filters for Halloween, so they got right down to the business of drawing.

I drew a tree on one for my son to decorate and we talked about ornaments, garland, and what to put on top of the tree.


Older children can cut out the snowflake designs themselves. It's Always Autumn has a free video and templates helping you and your children cut out interesting snowflake patterns.

Looking for patterns to make your own snowflakes?

Sunday, December 25, 2016

Teenage Mutant Ninja Turtle Ornaments


Materials 

  • Toilet Paper Rolls (2 needed for one set of ornaments) 
  • Green Paint
  • Paint Brush
  • Googly Eyes
  • Materials for masks (tissue paper, felt, construction paper, ribbon) 
  • Glue 
  • Ribbon (for hanging) 
  • Hole Punch


Steps 

1. Gather materials.
2. Paint toilet paper rolls (inside and outside).

3. After they dry, cut in half.


4. Cut material for masks.
5. Glue masks onto toilet paper rolls.

6. Glue googly eyes onto masks.


7. Punch holes in top of toilet paper rolls.


8. Cut and then tie ribbon for hanging through holes.


9. Hang on tree.


My husband was a fan of the cartoon, Teenage Mutant Ninja Turtle so when I saw Happy Hooligan's craft, I knew it would be perfect for my son to make for him.  As we were already painting some toilet paper rolls green for trees, this was a breeze to add a few more to be painted.

There are lots of different Teenage Mutant Ninja Turtle Ornament crafts to make for your tree.  Check out these three different options.


Personally, I have seen a few minutes of the original series but haven't really watched any of the sequels or reboots. There is a huge selection on Amazon of DVDs as well as toys.  (affiliate links)