Showing posts with label animal crafts. Show all posts

Friday, November 3, 2023

Learning Year Round: Autumn Homeschool Plans

A Mom's Quest to Teach: Learning Year Round: Autumn Homeschool Plans leaf clipart

This post contains affiliate links. Please see my Terms of Use and Disclosure Policy page for more information. Thank you.

How do you homeschool in the autumn? In about half the world, the temperature is dropping, and homeschooling outdoors is becoming more difficult. The cooler weather might bring sneezing due to seasonal allergies or rainy days. On the plus side, leaves changing and animals preparing for the winter allow our children new things to study. 


Homeschool Plans Outdoors 

Leaves falling brings a new way to study trees. It might be easier to identify specific leaves and trees when you can easily hold the leaf in your hand. Your children can also collect leaves without having to pull any off the trees! 

Two of my favorite courses at SchoolhouseTeachers.com offer options for studying trees: 

  • Let's Do Science Outside
  • Let's Do Art Outside 
In Let's Do Science Outside, there is a Tree ID Activity and a Tree Tally Chart, which are perfect for early elementary-aged children. For even more ideas about how to use trees and leaves in your homeschool lessons, Let's Do Art Outside offers activities such as 'how to make a leaf owl," "playdough leaf prints," and more. 

If your children collect a lot of leaves, there are numerous craft possibilities. From creating a leaf-themed turkey to making a letter craft, the options are endless. As long as the leaves aren't too brittle, you can even use them for painting. 


Working as a Family 

The change in seasons offers a time for children to learn more about what it takes to care for their home and property. Have them work alongside you as you rake leaves, put away summer toys and tools, and prepare your home for the winter. They will learn valuable skills as well as enjoy the time spent with their parents. 

Autumn homeschool plans can also include harvesting the last of the garden's bounty and preparing the ground for the next season. Pick those last pumpkins or other crops and plan out recipes to use up the last of the harvest. Or learn about canning and preserving food as a family. There are so many lessons we can teach by working together as a family. 

A Mom's Quest to Teach: Learning Year Round: Autumn Homeschool Plans; leaf clip art; owl craft


Learning Year Round About Animals 


The autumn season also allows you to focus on different animals with your family. Depending upon where you live, you might be able to track the migration of birds or how mammals in your area prepare for the winter. Read about hibernation, migration, and more to study how animals adapt to the seasonal change. 

For your little ones, have fun creating a bear craft or an owl craft while you study those animals. Or add some simple toys to their collection for imaginary play. The ideas are only limited by how much time you want to spend on studying animals and following your children's interests. 

Reading Books 

Don't forget to include books in your autumn homeschool plans! We've shared a few favorites in past years, and we are always looking out for new ones. If you have any, please share in the comments. 

Tuesday, July 25, 2023

Crafts: Fishy Scales Painting

Crafts: Fishy Scales Painting with A Mom's Quest to Teach Logo and fish clip art

This post contains affiliate links. Please see my Terms of Use and Disclosure Policy page for more information. Thank you.

Painting is always a favorite pastime of our children so I love coming up with new ways to paint. Whether we are using nonconventional paints or inks (such as using raspberry juice to paint), new techniques, or new methods, painting always brings joy and happiness to our homeschool. It is the perfect activity for the summer too! 

Fish Facts 


Let's focus on some fun fish facts for preschoolers! 

How are fish similar to us? They have eyes, nares (for smelling), a mouth, and skin, but a lot of the similarities end there. They spend their entire lives in water, while humans spend most, if not all, of their lives on land. They are specially adapted to live in water with protected skin (via their scales), fins, and a special way of breathing.

There are over 20,000 different species of fish! If you live near a baseball, football, or sports arena, find out how many seats it has. You can help your preschool visualize how many fish there are by visiting the arena to see all the seats. 

How do fish breathe? They use gills to help them breathe. Water runs over the gills, and capillaries in the gills gather the oxygen that is dissolved in the water. The blood then travels through the fish's body to deliver oxygen (just like in humans).


Materials 

Paint, construction paper, bubble wrap, pencil


Steps 

1. Gather all of your materials. 

2. Draw a fish on one color of construction paper. 

3. Cut out the fish and then glue it onto a second sheet of construction paper of a different color. 

4. Cut the bubble wrap into smaller pieces that you can easily handle. 

5. Pour paint on washable, recyclable, or disposable paint trays. We used old yogurt lids. 

6. Gently dip the bubble wrap into the paint. Make sure it is the side with the bubbles. You can also use a paintbrush to paint the different colors onto your bubble wrap. 

using bubble wrap to paint scales on a construction paper fish


7. Gently stamp your fish with the painted bubble wrap. 

8. When your fish looks like it has lots of scales, your painting is complete. 

9. Hang up after the fish is dry.

Crafts Fishy Scales Painting with finished craft project and fish clip art


Tips and Tricks 

When I first dipped the bubble wrap into the paint, I got way too much paint on it. It really didn't create the small dots or scale effect I wanted. Our children gently dipped the bubble wrap into the paint after seeing my mistake. We would also recommend only dipping the bubble wrap into the paint once before transferring the paint to your fish. If you do get too much paint on the bubble wrap, use a piece of scrap paper to get the excess off. 

You can also drag the bubble wrap across your painting and pat down slowly but carefully on your fish. This will create a neat effect for your fish painting.  


Fishy Scales Painting with course covers from SchoolhouseTeachers.com and finished project


Resources 

If you are looking for some fun activities for the summer, Everyday Games on SchoolhouseTeachers.com offers a variety of fish-themed mathematics and language arts games. You can find games that review rhyming, the silent letter e, counting by 5s, multiplication, and more! 

Study fish in more detail with Exploring God’s World with Third Grade Science. In semester one, you and your third grader will spend a week learning about fish. Or study a variety of interesting creations with your fourth-sixth graders with Discovering Disgusting Creatures


Monday, July 24, 2023

Crafts: Sea Turtles

Crafts: Sea Turtles

This post contains affiliate links. Please see my Terms of Use and Disclosure Policy page for more information. Thank you.

Since it is summertime, why don't we dive under the water and create a fun sea turtle craft? This craft does not require a lot of materials and provides a wonderful opportunity to learn more about these beautiful creatures.

Sea Turtle Facts 


Sea turtles, also known as marine turtles, are migratory species that live primarily in the ocean or sea. The females will come to land to lay eggs (most often returning to the same beach where they hatched), but they spend the majority of their time in the ocean. There are seven species of sea turtles which include the
  • Loggerhead
  • Green
  • Hawksbill 
  • Leatherback
  • Kemp's Ridley
  • Olive Ridley 
  • Flatback

Turtles are part of the Reptile Class. They are the only reptiles with shells! Their shell is actually part of their body, and – unlike scenes depicted in cartoons – they can not remove their shells. The carapace (upper part of the shell) is attached to its backbone and ribs.

The carapace is covered in scales, also known as scutes. The scutes are made up of the same thing that fingernails are – keratin. The scutes are generally square-shaped and will grow with the turtle. Some species shed the scutes, while others just have ones that grow larger as they grow.


Materials 


Steps 


1. Gather all of your materials. 


labeling of construction paper cutouts for sea turtle craft (head, tail, flippers)


2. Draw or trace the head, tail, and flippers for your sea turtle. 

3. After cutting out the head, tail, and flippers, make sure they are the right size for your turtle shell. 

4. Draw the scales or scutes for your turtle shell on the coffee filter. (Place a piece of scrap paper under your coffee filter as the markers will bleed through the coffee filter.) 

coloring with green marker on coffee filter to create sea turtle shell


5. After your child has drawn the scutes/scales on the coffee filter, attach the head, tail, and flippers to your sea turtle shell. 

6. After the project is completed, you can hang it up in the window. 

Crafts: Sea Turtles with photo of completed craft project


Learn More About Sea Turtles and Other Ocean Creatures 


For children who are in middle school to high school, SchoolhouseTeachers.com offers Animal Science with an entire lesson on turtles and tortoises. Learn about the differences between turtles and tortoises, their physiological makeup, and how to build a habitat for a local one. 

For younger children in later elementary school, you can study turtles in Wildlife Adventures. Over 15 weeks, children will study sea turtles, bald eagles, pelicans, and more as they learn new vocabulary, study geography, and read Bible passages. 

If you are looking for your homeschool curriculum for next year, check out SchoolhouseTeachers.com! There are over 400 courses for your entire family – preschool to high school and courses for parents, too. Your membership also includes the Schoolhouse SmartMama Planner, a monthly menu, virtual events, and access to many videos for your family. 


Sea Turtles; covers of two SchoolhouseTeachers.com courses; completed sea turtle craft


Wednesday, October 12, 2022

Crafts: Bear Figure

 A Mom's Quest to Teach logo: Crafts: Bear Figure; background figure of bear

This post contains affiliate links. For more information, please see my Terms of Use and Disclosure Policy page. Thank you.

Our daughter loves arts and crafts. This has always been one of her favorite parts of the homeschool day. So I love thinking of different crafts for us to create together using common household items and other materials we have on hand. 

While spending time learning about black bears, grizzly bears, polar bears, and more, I designed several different crafts including a collage, a paper bag puppet, and this bear figure. We also included some lessons from SchoolhouseTeachers.com as well as some favorite childhood books to read. 


A Mom's Quest to Teach logo: Crafts: Bear Figure; completed bear figure


Materials 


Steps 


1. Gather all your materials. 


A Mom's Quest to Teach logo; construction paper, glue stick, glue bottle


2. Cut out the pieces for your bear figure. You will need a large brown circle for the head, two small brown circles for the ears, one small orange, oval-like shape for the muzzle, one brown shape for the back legs, and two brown shapes for the arms. 

3. After the pieces are cut out, draw a face on the large circle. 

4. Draw a nose on the orange piece. 

5. Glue the orange muzzle on the large circle. 

6. Attach the large circle to the toilet paper roll. 

7. Attach the ears to the circle. 

8. Attach the back legs. 

9. Attach the front legs. 

10. After the glue dries, the bear figures are ready to play with! 


A Mom's Quest to Teach logo; two completed bear figure crafts


Looking for a Great Resource? 

As the fall season progresses, I love including seasonal content in our homeschool lessons. One of my favorite places to go to look for seasonal lessons is SchoolhouseTeachers.com. After clicking on their holiday and seasonal content, I go look through lessons, games, and more that fit into several different categories, including: 

  • Christmas 
  • Summer
  • Easter
  • Fall 
  • Holiday/Seasonal (New Year's Day, President's Day, Mother's Day, Fourth of July, and many more!)  
For this season, I am looking at the Nature and Outdoors Homeschool Science Course for our daughter. There are units on owls and acorns that will we focus upon first. There are instructions for a nature journal and, since she likes her Bible Notebook which is part of the My Father's World Curriculum, I think this might be a hit with her, as well.


SchoolhouseTeachers.com course cover for nature/outdoors with racocon


Monday, October 3, 2022

Crafts: Bear Collage

 A Mom's Quest to Teach logo - Crafts: Bears with forest background and bear clip art

This post contains affiliate links. For more information, please see my Terms of Use and Disclosure Policy page. Thank you.

Whenever I prepare crafts for our children, I usually save the scraps of paper and construction paper in a plastic envelope and several gallon size plastic bags. There are many times when I need only a small piece of black construction paper for eyes or maybe a bit of red to create a tongue for an animal puppet. My storage has been filling up so I decided to do a simple craft with our daughter to use up some of the pieces. 

We've been talking about bears in our homeschool as we study different animals and habitats using her science curriculum, so it seemed natural to design several different bear crafts. For this one, I look for a silhouette of a bear online to draw onto a sheet of white paper. I then asked her to trace this bear for her own paper. After that, it was quite simple to create our bear collage. 


Materials 


Steps 


1. Draw a picture of your bear. Make sure it is large and covers the whole paper. 

2. Gather all the materials nearby. 


A Mom's Quest to Teach; scissors, glue stick, construction paper, pencil, drawing of a bear outline


3. You may want to pre-cut the pieces of construction paper scraps to fit the outline of your bear. Our daughter and I cut our pieces as we went along to make sure we had the pieces we wanted. 

4. Glue the pieces onto your bear filling in the outline. 


A Mom's Quest to Teach logo - Crafts: Bears; tree background; partially completed bear craft with scissors


5. Display your completed bear collage. 


A Mom's Quest to Teach logo; two photos showing bear craft in beginning and final stage


What to Know More About Bears? 


How many bears can you name? According to National Geographic, "there are eight species: Asiatic black bears (also called moon bears), brown bears (which include grizzly bears), giant pandas, North American black bears, polar bears, sloth bears, spectacled bears (also called Andean bears), and sun bears." They all belong to the Ursidae family and are omnivores. They range in size from four feet to eight feet and live in a variety of habitats. If you want to study just those who are native to North America, you would limit your studies to the North American black bear, brown bears, and polar bears. 

North American Black Bear 

The most common bear in North America is the black bear which can actually be a number of different colors and shades including black, a cinnamon brown color, blonde, gray/glue, and even white. Depending upon where the black bear lives in North America, the color, diet, sleeping pattern, and more may be different. The National Park Service offers a nice comparison between black bears who live in two different habitats in North America.  

Black bears have a varied diet and the specifics depend upon where they live and the time of year. As omnivores, they eat plants and meat. They eat roots, berries, fish, and insects, and are able to kill and eat adult deer. Unfortunately, they are also attracted to human garbage, livestock food, and fruit trees planted on farms, which brings them into contact with humans. This can cause problems as they become a nuisance to humans or no longer see humans as a threat. 


Learn More at SchoolhouseTeachers.com 


SchoolhouseTeachers.com A World of Animals course cover featured on book, laptop, and


SchoolhouseTeachers.com offers a number of courses for your children to learn more about animals including God's Beautiful Creatures. In this course, students in kindergarten through second grade discover over a hundred animals including the brown bear and polar bear and red deer, European rabbits, mandarin ducks, arctic terns, and much more! This homeschool science course is perfect for early readers as the books are simple and the activities include journaling and drawing. 

Monday, September 5, 2022

Crafts: Shark Sun Catcher

 A Mom's Quest to Teach: Crafts: Shark Sun Catcher; shark clip art with ocean background

This post contains affiliate links. For more information, please see my Terms of Use and Disclosure Policy page. Thank you.

We love making sun catchers in our homeschool from coffee filters. Because they are relatively inexpensive, we have been able to make a variety of crafts from coffee filters over the years to hang in our windows. Today let's make a shark-themed sun catcher! 

Since we will be making a sun catcher today, let's talk about sharks' senses. Sharks have keen senses that help them hunt. From excellent hearing to sensitive eyesight, they can easily seek out their dinner. Sharks can hear low-pitched sounds rather well and their eyesight allows them to see in the dim waters better than we can. The location of the sharks' eyes helps them see in almost every direction. They are also super sensitive to smell and their sense of touch is also developed to help them hunt. 


Materials 


A Mom's Quest to Teach; glue stick, scissors, construction paper, gray markers, coffee filter


Steps 

1. Gather all your materials. 

2. Color the coffee filter with gray markers. 

3. Spray the coffee filter with water to create the effect. 

A Mom's Quest to Teach; coloring a coffee filter gray and spraying a coffee filter with water


4. Cut out the pieces for your shark from the construction paper. 

5. After your coffee filter is dry, glue the pieces onto your gray coffee filter. 

6. Hang your shark in your window.


A Mom's Quest to Teach: Crafts: Shark Sun Catcher; complete coffee filter shark craft; shark clipart


Do You Want to Learn More About Sharks? 

SchoolhouseTeachers.com offers over 400 courses for your homeschool. Included in those courses are All About Animals and Everyday Games. In Crafts: Create a Shark Filled Ocean, I shared about the course All About Animals but if you aren't ready to dive into that particular science course with your first or second grader, you can add in fun shark-themed games using the ones found in Everyday Games.


Everyday Games SchoolhouseTeachers.com class logo


In Everyday Games, you will find lessons for language arts and mathematics using a shark theme. There are addition and multiplication games, as well as games featuring synonyms, antonyms, verbs, nouns, and more! You can print the games out and use them as many times as you want to help your children learn their math facts or their language arts facts.


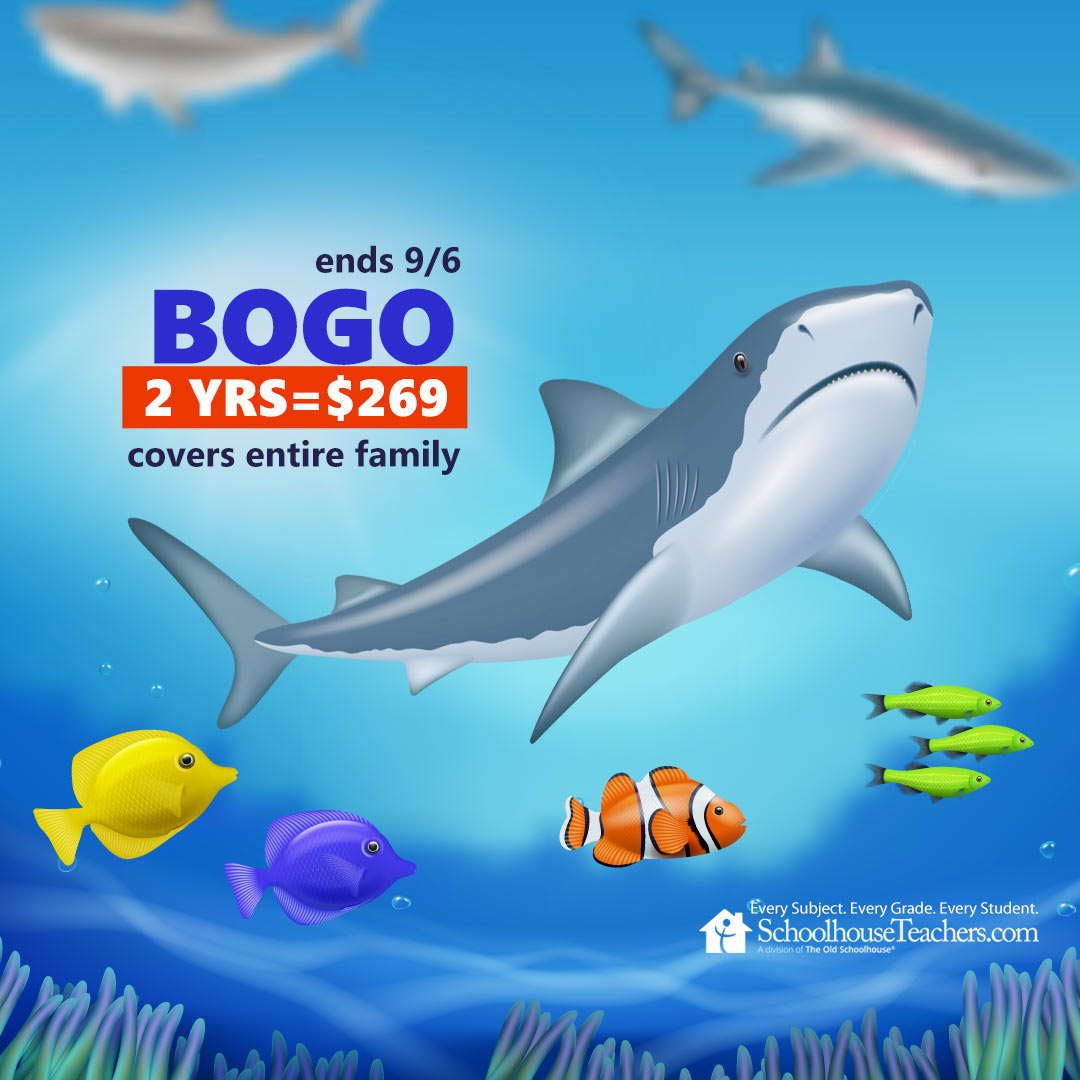
Now Through September 6, 2024! 


Dive into our Shark & Sea BOGO Sale at SchoolhouseTeachers.com! From July 22 to
September 6, buy one annual membership for $269 and get another year free! Did you
know that sea turtles can live up to 100 years? Our courses have the longevity and quality you
need with hundreds of courses available for all grades. Don’t let this deal swim away!


Tuesday, August 30, 2022

Crafts: Shark Painting

A Mom's Quest to Teach logo: Crafts: Shark Painting; Shark photograph in background

This post contains affiliate links. For more information, please see my Terms of Use and Disclosure Policy page. Thank you.

We love painting in our homeschool. So, I am always looking for new ways to incorporate painting into our homeschool day. For this shark-themed craft, I decided we would do something similar to the Father's Day painting we did a few years ago. We created the shape of the sharks as negative space so they would stand out on our paper when we were finished painting.


Materials 

  • Painting paper
  • Paint in a variety of colors 
  • Sponge brushes or cotton balls 
  • Something to hold the paint for dipping the sponges/cotton balls into the paint 
  • Paper for cutting our shark shapes
  • Tape 

paint, sponge paintbrushes, shark clipart, white paper


Steps 

1. Gather all your materials. 

2. Cut out two or more basic shark shapes. 

3. Tape the shark shapes onto your painting paper. 

4. Use sponges or dot paints to paint on and around your shark shapes. 


A Mom's Quest to Teach logo; shark clip art; painting shark painting


5. After the paint is dry, remove the shark shapes to reveal the outline of your sharks. 

6. Hang up your new artwork. 


shark painting


How is a Shark Designed? 

While waiting for your shark to dry, talk about the design of a shark with your children. They have special features which enable them to be fierce predators of the sea. There are over 1,000 species of sharks and rays, so you will have plenty to choose from to discuss. 

Sharks are different from other fish as they have boneless skeletons. They have cartilage in its place to help provide support. The fact that they don't have bones but cartilage also enables them to stay afloat easier as they are lighter. 

The lighter body also helps them in swimming. They are also streamlined to help them move through the water. So many sharks have a torpedo-like shape. They are probably one of the most agile creatures in the sea. 

Fins 

With the variety of sharks, there is also a variety of fins on those sharks. They have a large dorsal fin that helps provide balance. Some have a smaller dorsal fin on their back too. Sharks may also have pectoral fins that help with steering. 


A Mom's Quest to Teach: Crafts: Shark Painting; photo of completed painting with shark clip art


Learn More 


Make another shark-themed craft! Choose from a paper bag shark puppet or a paper plate craft


Red Wagon Marine Biology for High School Course cover from SchoolhouseTeachers.com

Dive into the world of Marine Biology at SchoolhouseTeachers.com with Red Wagon Marine Biology for High School. This high school course is taught with online pre-recorded videos and text instructions to help children learn about the marine world. In addition to studying sharks, students will learn about marine ecosystems, tidal zones, coral reefs, and more. 

And now is the perfect time to become a SchoolhouseTeachers.com member with the BOGO sale! Dive into our Shark & Sea BOGO Sale at SchoolhouseTeachers.com! From July 22 to September 6, buy one annual membership for $269 and get another year free! Did you know that sea turtles can live up to 100 years? Our courses have the longevity and quality you need with hundreds of courses available for all grades. Don’t let this deal swim away!

Sale through September 6, 2024. 

BOGO 2 yrs=$269


Wednesday, August 24, 2022

Crafts: Create a Shark Filled Ocean

A Mom's Quest to Teach logo: Crafts: Create a Shark Filled Ocean; shark clipart

This post contains affiliate links. For more information, please see my Terms of Use and Disclosure Policy page. Thank you.

When you hear the word, "Shark," what do you imagine? Are you seeing a terrifying creature jumping out of the ocean to attack any animal in sight? Or are you fondly remembering a fun trip to a touch tank at your local aquarium? 

Sharks are often considered one of the most fearsome animals in the world. Yet not all sharks rank among the top scary ones. After all, there are over 400 different species of sharks in the ocean. They can't all be scary.

Even though there are 50 species of sharks that are considered potentially dangerous to humans, they don't regularly go around attacking humans. There are some easy tips you can apply to stay safe when swimming in waters frequented by sharks who may pose a threat. You can read ten tips at National Geographic or eight safety tips at Australian Geographic

For your craft, you can decide upon a variety of sharks. For example, you could draw and cut out one of the following types: 

  • Basking Shark
  • Bull Shark 
  • Great White Shark
  • Hammerhead Shark
  • Mako Shark 
  • Nurse Shark
  • Whale Shark
  • Thresher Shark 

Materials


Steps 


Gather all your materials for your shark craft. 


A Mom's Quest to Teach; scissors, dot paint, shark cut outs, paper plates, glue sticks


Cut a quarter of one paper plate. 

Paint both paper plates with various shades of blue. 


A Mom's Quest to Teach: Crafts; shark clipart; painting paper plates with kwix stix paint

Allow your plates to dry. While they are drying, draw and cut out your shark.


After your paper plates are dry, glue your shark onto the paper plate that is NOT cut. Position the shark so that part of it will be seen through the slice of the cut paper plate. You can add more than one shark if you wish. 

A Mom's Quest to Teach logo: Crafts: Create a Shark Filled Ocean; shark cut out glued onto blue painted paper plate

Attach the cut paper plate to the top of the whole one with the paper fastener. 


A Mom's Quest to Teach: completed paper plate shark craft with shark peaking out of a cut out on paper plate


Now turn your top paper plate so that the shark disappears behind the waves. 


Want to learn more about sharks? 


All About Animals course image


SchoolhouseTeachers.com has several courses that your elementary-aged student or high school student can learn about sharks and marine life in general. In All About Animals, our first or second graders will read through a variety of colorful eBooks to learn about different wild animals. In Under the Sea, your child will read about dolphins, whales, rays, crabs, and the shark! Realistic drawings and photographs highlight the different species of sharks and share the different parts of the shark body. 

Dive into a world of educational adventures with our Shark & Sea BOGO Sale! From July 22 to September 6, buy an annual SchoolhouseTeachers.com membership for $269 and get a second year FREE! Did you know that octopuses have three hearts? Just like them, we put our heart into every course we offer. Unlimited access to hundreds of courses for all grade levels.

Don’t miss out! Visit SchoolhouseTeachers.com to learn more!


Homeschool for $269 for two years BOGO Sale


Create your own shark paper bag puppet


Baby Shark! book and paper bag craft with shark clip art


Monday, June 27, 2022

Art in Our Homeschool: A Review of Tiger Crystal Art Card Kit

 A Mom's Quest to Teach logo: Art in Our Homeschool: A Review of Tiger Crystal Art Card Kit; tiger print background

I received a COMPLIMENTARY copy of this Card Kit from Timberdoodle in exchange for my honest opinion. I was not required to write a positive review, nor was I compensated in any other way. This post contains affiliate links. For more information, please see my Terms of Use and Disclosure Policy page. Thank you.


Do you have one of those subjects in your homeschool that sometimes gets neglected? For us, it is often art. While our children love arts and crafts, I often save those projects for another day because we run out of time, need to gather materials, etc. Knowing how important the arts are to developing various skills, I was very pleased to review the Tiger Crystal Art Card Kit from Timberdoodle with our two children. The Kit is included in the 2022 Fourth-Grade Curriculum Kit from Timberdoodle which I think is a perfect fit. 

What is the Tiger Crystal Art Card Kit? 

This self-contained art kit includes all the components one needs to create a beautiful work of art. In our case, the card kit depicted a tiger. The company does have other kits available including a lion, kittens, owl, horse, and others. 

In the kit we found: 

  • 1 Card 
  • 1 Envelope 
  • Bags of Crystals 
  • Empty Plastic Resealable Bags 
  • 1 Crystal Pick-Up Pen 
  • Jelly Wax
  • Tray 
The card is covered with a plastic piece as the card itself is sticky so you can place the crystals. The instructions are located on the inside of the kit package and written in English, German, French, and Dutch. So, in addition to incorporating art into your homeschool, you can try out your language skills by comparing the instructions. 

Crystal card kit unopened package, crystals in bags; putting crystals on tiger


How Did We Use the Tiger Crystal Art Card Kit? 


When it first arrived, our daughter was very excited to get started. She loves arts and crafts so this was perfect for her. After opening it, I was apprehensive that she would be able to complete it as she only turned seven and it is included in the Fourth-Grade Curriculum Kit. It looked like it would take great concentration to complete this kit. Would our daughter and our son have the patience to work on it? 

The first day I set aside time to work on the Tiger Crystal Art Card Kit, I let our children pick which color we would complete first. We opened the appropriate bag of crystals, poured them into the tray, put the Jelly Wax near the tray, and started working. I began the process to show our children how to use the Pick Up Pen (or stylus). Our daughter quickly wanted to try it on her own. I held the plastic piece up off the card so she could apply the crystals. 

Between the three of us, we completed that first color over the course of the day. I would work on it for a little bit and then go back to work or homeschool one of our children. Our daughter would work on it for a time while her brother and I were working on spelling or language arts. Our son would then work on it after he completed his other homeschool assignments. We continued this process for several days. I even left it out so they could work on it throughout the whole day and evening. And there were quite a few nights I worked on the Tiger Crystal Art Card Kit on my own as I found it relaxing. 


crystals in tray with pick up pen; working on tiger art picture


How Do You Complete the Picture? 


Choose which area of the card you want to work on and then look at the letter on the card. Find the bag of crystals labelled with that letter and pour them into your tray. Use the Pick Up Pen, after dabbing it into the Jelly Wax, to pick up the crystals. The crystals are attached to the dots labelled with the letter you chose. Don't remove the entire plastic piece until you are completed to protect the sticky parts of the card. 

When you are done with a specific letter, put that in a small plastic resealable bag and label it. You may notice you missed a few spots like we did and need to go back and fill them in later. 


A Mom's Quest to Teach logo: Art in Our Homeschool: A Review of Tiger Crystal Art Card Kit; tiger art on tiger print background


What Did We Think? 


At first, I was very concerned that our children would not be able to complete the project. It seemed to require great patience and hand-eye coordination. Would this work? I really thought that I would have to complete the entire card on my own but thankfully I was wrong. Our children enjoyed the process and seeing the card transform into a sparkly picture with the crystals. This simple card kit really brought art in our homeschool to life! 

What about the process? Was it easy to transfer the tiny crystals to the sticky card? Yes and no. If the crystals were the right side up, one could easily use the Pick Up Pen to transfer them if you had enough Jelly Wax on the Pen. Sometimes the crystals would fall off during the transfer but that wasn't that often. And we did have to gently shake the tray to flip the crystals over so we could pick them up the right way.  Once you get into a rhythm, it is quite easy to fill the entire card with the color you are working on at that time. 

We did notice that we had some duplicate bags of colors and one letter had two different bags of crystals. This wasn't too confusing and it did not impact our picture at all. 

I really enjoyed working on the Tiger Crystal Art Card Kit. I found it relaxing and enjoyable. While our soon-to-be fourth grade son enjoyed this homeschool art project, our daughter really liked it. So I would definitely recommend it for your daughters who love arts and crafts. If they have good dexterity and patience, then a child as young as seven might be able to complete this with a little help. 

Our daughter shared, "Though hard at first, it was actually easy once you got used to using the pen to grab the crystals and putting them on the card." She said it was a lot of fun. Our son said it was an "epic experience." 

This kit really brought art in our homeschool to life! Both our son and our daughter recommend it for your homeschool. 

A Mom's Quest to Teach logo; completed tiger art picture