Showing posts with label Children's Crafts. Show all posts

Friday, July 26, 2024

Book Club: Book Review of The Beginner's Bible Craft and Activity Book

A Mom's Quest to Teach logo: Book Club: Book Review of The Beginner's Bible Craft and Activity Book

I received a COMPLIMENTARY copy of this book from the publisher in exchange for my honest opinion. I was not required to write a positive review or be compensated in any other way. This post contains affiliate links. Please see my Terms of Use and Disclosure Policy page for more information. Thank you.

The Beginner's Bible Craft and Activity Book is a good resource for families, Christian schools, and Sunday Schools. It is full of 30 fun projects based on Bible stories. The paperback book published by Zonderkidz features color photographs and illustrations. 

About the Book 

Everyday objects can be easily made to help bring your Bible time to life. There are 30 projects that align with stories in both the Old and New Testaments found in The Beginner's Bible. However, I do not think you need to have The Beginner's Bible in order to use this book in your home. You can easily seek out the stories referenced in the Bible translation of your choice. 

Some of the crafts include: 

  • Snake sock puppet
  • Decorating a t-shirt 
  • Friendship bracelet 
  • Paper plate crown 
Some of the activities include: 
  • Making a banana boat dessert
  • Baking bread 
  • Creating a blanket tent 
Some of the Bible stories include: 
  • Creation 
  • Joseph 
  • David and Goliath 
  • Jonah
  • John the Baptist 
  • Jesus' entrance into Jerusalem (Palm Sunday) 

A Mom's Quest to Teach: Book Club: Book Review of The Beginner's Bible Craft and Activity Book cover


Our Thoughts 


This is a great resource for homeschooling families and children's church leaders who need help making connections to the Bible fun and relatable. I found quite a few crafts and activities that would I like to do with our children. For example, I would like to make the three crafts connected with the flood and Noah, the Ten Commandments, and Psalm 23. Our son and daughter are looking forward to building a tent under our dining room table. And our daughter is eager to help me bake bread.

We made one craft so far (the handprint dove) and read through a few of the stories shared before the craft instructions. The only recommendation I would have for the book is to include step-by-step instructions for parents (and children) who need extra help to complete projects. If that can't be included in the book, perhaps a website could have the images as additional content. 


handprint dove


Looking for More Crafts? 

Friday, November 3, 2023

Learning Year Round: Autumn Homeschool Plans

A Mom's Quest to Teach: Learning Year Round: Autumn Homeschool Plans leaf clipart

This post contains affiliate links. Please see my Terms of Use and Disclosure Policy page for more information. Thank you.

How do you homeschool in the autumn? In about half the world, the temperature is dropping, and homeschooling outdoors is becoming more difficult. The cooler weather might bring sneezing due to seasonal allergies or rainy days. On the plus side, leaves changing and animals preparing for the winter allow our children new things to study. 


Homeschool Plans Outdoors 

Leaves falling brings a new way to study trees. It might be easier to identify specific leaves and trees when you can easily hold the leaf in your hand. Your children can also collect leaves without having to pull any off the trees! 

Two of my favorite courses at SchoolhouseTeachers.com offer options for studying trees: 

  • Let's Do Science Outside
  • Let's Do Art Outside 
In Let's Do Science Outside, there is a Tree ID Activity and a Tree Tally Chart, which are perfect for early elementary-aged children. For even more ideas about how to use trees and leaves in your homeschool lessons, Let's Do Art Outside offers activities such as 'how to make a leaf owl," "playdough leaf prints," and more. 

If your children collect a lot of leaves, there are numerous craft possibilities. From creating a leaf-themed turkey to making a letter craft, the options are endless. As long as the leaves aren't too brittle, you can even use them for painting. 


Working as a Family 

The change in seasons offers a time for children to learn more about what it takes to care for their home and property. Have them work alongside you as you rake leaves, put away summer toys and tools, and prepare your home for the winter. They will learn valuable skills as well as enjoy the time spent with their parents. 

Autumn homeschool plans can also include harvesting the last of the garden's bounty and preparing the ground for the next season. Pick those last pumpkins or other crops and plan out recipes to use up the last of the harvest. Or learn about canning and preserving food as a family. There are so many lessons we can teach by working together as a family. 

A Mom's Quest to Teach: Learning Year Round: Autumn Homeschool Plans; leaf clip art; owl craft


Learning Year Round About Animals 


The autumn season also allows you to focus on different animals with your family. Depending upon where you live, you might be able to track the migration of birds or how mammals in your area prepare for the winter. Read about hibernation, migration, and more to study how animals adapt to the seasonal change. 

For your little ones, have fun creating a bear craft or an owl craft while you study those animals. Or add some simple toys to their collection for imaginary play. The ideas are only limited by how much time you want to spend on studying animals and following your children's interests. 

Reading Books 

Don't forget to include books in your autumn homeschool plans! We've shared a few favorites in past years, and we are always looking out for new ones. If you have any, please share in the comments. 

Tuesday, July 25, 2023

Crafts: Fishy Scales Painting

Crafts: Fishy Scales Painting with A Mom's Quest to Teach Logo and fish clip art

This post contains affiliate links. Please see my Terms of Use and Disclosure Policy page for more information. Thank you.

Painting is always a favorite pastime of our children so I love coming up with new ways to paint. Whether we are using nonconventional paints or inks (such as using raspberry juice to paint), new techniques, or new methods, painting always brings joy and happiness to our homeschool. It is the perfect activity for the summer too! 

Fish Facts 


Let's focus on some fun fish facts for preschoolers! 

How are fish similar to us? They have eyes, nares (for smelling), a mouth, and skin, but a lot of the similarities end there. They spend their entire lives in water, while humans spend most, if not all, of their lives on land. They are specially adapted to live in water with protected skin (via their scales), fins, and a special way of breathing.

There are over 20,000 different species of fish! If you live near a baseball, football, or sports arena, find out how many seats it has. You can help your preschool visualize how many fish there are by visiting the arena to see all the seats. 

How do fish breathe? They use gills to help them breathe. Water runs over the gills, and capillaries in the gills gather the oxygen that is dissolved in the water. The blood then travels through the fish's body to deliver oxygen (just like in humans).


Materials 

Paint, construction paper, bubble wrap, pencil


Steps 

1. Gather all of your materials. 

2. Draw a fish on one color of construction paper. 

3. Cut out the fish and then glue it onto a second sheet of construction paper of a different color. 

4. Cut the bubble wrap into smaller pieces that you can easily handle. 

5. Pour paint on washable, recyclable, or disposable paint trays. We used old yogurt lids. 

6. Gently dip the bubble wrap into the paint. Make sure it is the side with the bubbles. You can also use a paintbrush to paint the different colors onto your bubble wrap. 

using bubble wrap to paint scales on a construction paper fish


7. Gently stamp your fish with the painted bubble wrap. 

8. When your fish looks like it has lots of scales, your painting is complete. 

9. Hang up after the fish is dry.

Crafts Fishy Scales Painting with finished craft project and fish clip art


Tips and Tricks 

When I first dipped the bubble wrap into the paint, I got way too much paint on it. It really didn't create the small dots or scale effect I wanted. Our children gently dipped the bubble wrap into the paint after seeing my mistake. We would also recommend only dipping the bubble wrap into the paint once before transferring the paint to your fish. If you do get too much paint on the bubble wrap, use a piece of scrap paper to get the excess off. 

You can also drag the bubble wrap across your painting and pat down slowly but carefully on your fish. This will create a neat effect for your fish painting.  


Fishy Scales Painting with course covers from SchoolhouseTeachers.com and finished project


Resources 

If you are looking for some fun activities for the summer, Everyday Games on SchoolhouseTeachers.com offers a variety of fish-themed mathematics and language arts games. You can find games that review rhyming, the silent letter e, counting by 5s, multiplication, and more! 

Study fish in more detail with Exploring God’s World with Third Grade Science. In semester one, you and your third grader will spend a week learning about fish. Or study a variety of interesting creations with your fourth-sixth graders with Discovering Disgusting Creatures


Monday, July 24, 2023

Crafts: Sea Turtles

Crafts: Sea Turtles

This post contains affiliate links. Please see my Terms of Use and Disclosure Policy page for more information. Thank you.

Since it is summertime, why don't we dive under the water and create a fun sea turtle craft? This craft does not require a lot of materials and provides a wonderful opportunity to learn more about these beautiful creatures.

Sea Turtle Facts 


Sea turtles, also known as marine turtles, are migratory species that live primarily in the ocean or sea. The females will come to land to lay eggs (most often returning to the same beach where they hatched), but they spend the majority of their time in the ocean. There are seven species of sea turtles which include the
  • Loggerhead
  • Green
  • Hawksbill 
  • Leatherback
  • Kemp's Ridley
  • Olive Ridley 
  • Flatback

Turtles are part of the Reptile Class. They are the only reptiles with shells! Their shell is actually part of their body, and – unlike scenes depicted in cartoons – they can not remove their shells. The carapace (upper part of the shell) is attached to its backbone and ribs.

The carapace is covered in scales, also known as scutes. The scutes are made up of the same thing that fingernails are – keratin. The scutes are generally square-shaped and will grow with the turtle. Some species shed the scutes, while others just have ones that grow larger as they grow.


Materials 


Steps 


1. Gather all of your materials. 


labeling of construction paper cutouts for sea turtle craft (head, tail, flippers)


2. Draw or trace the head, tail, and flippers for your sea turtle. 

3. After cutting out the head, tail, and flippers, make sure they are the right size for your turtle shell. 

4. Draw the scales or scutes for your turtle shell on the coffee filter. (Place a piece of scrap paper under your coffee filter as the markers will bleed through the coffee filter.) 

coloring with green marker on coffee filter to create sea turtle shell


5. After your child has drawn the scutes/scales on the coffee filter, attach the head, tail, and flippers to your sea turtle shell. 

6. After the project is completed, you can hang it up in the window. 

Crafts: Sea Turtles with photo of completed craft project


Learn More About Sea Turtles and Other Ocean Creatures 


For children who are in middle school to high school, SchoolhouseTeachers.com offers Animal Science with an entire lesson on turtles and tortoises. Learn about the differences between turtles and tortoises, their physiological makeup, and how to build a habitat for a local one. 

For younger children in later elementary school, you can study turtles in Wildlife Adventures. Over 15 weeks, children will study sea turtles, bald eagles, pelicans, and more as they learn new vocabulary, study geography, and read Bible passages. 

If you are looking for your homeschool curriculum for next year, check out SchoolhouseTeachers.com! There are over 400 courses for your entire family – preschool to high school and courses for parents, too. Your membership also includes the Schoolhouse SmartMama Planner, a monthly menu, virtual events, and access to many videos for your family. 


Sea Turtles; covers of two SchoolhouseTeachers.com courses; completed sea turtle craft


Friday, November 18, 2022

Crafts: Praying for our Leaders

A Mom's Quest to Teach logo: Crafts: Praying for our Leaders; purple star background

This post contains affiliate links. For more information, please see my Terms of Use and Disclosure Policy page. Thank you.

Loving, Learning, Living, and Leading are all important things to teach our children in a Biblical Worldview. How can we do these things in our own lives? How can we be purposeful in the way we love as God taught us? How can we focus on learning about God and His world? How do we live our lives according to the Bible? And how can we lead others as God would want us to?  Over the course of four days, The Canadian Schoolhouse's Virtual Family Retreat: A Purposeful Life has touched upon these four areas. The whole family has a place in this virtual retreat. There are special speakers addressing both homeschooling moms and dads, crafts for your children, devotions, giveaways, and more. 

I want to start with several questions... Who are our leaders? Who has come before us in the Bible? Where can we look for leadership? How can we be leaders? 

We may not answer all these questions in this post, but I would encourage you to think about them as you create your craft, as you pray for our leaders, and as you read your Bible. 

Today's craft is inspired by a quote from Hebrews. 

"Remember your leaders, those who spoke to you the Word of God. Consider the outcome of their way of life, and imitate their faith." Hebrews 13:7

Remember those who serve as your leaders – those who lead your family, your church, your town, your province, and your nation. This verse in the New Testament helps us to remember the leaders of our church. And we can also remember the leaders of today.


Gather the materials; two paper plates; pencil; scissors; markers; paper fastener


Materials 


Today, we are going to make a simple craft that will help us to pray for our specific leaders. So, let's gather our materials! You will need two paper plates – the cheaper ones are perfect for this craft. You will need a pencil and markers (or you can use crayons or colored pencils). 


Steps 


1. After you get your materials together, write down the names of the leaders who you want to include. Depending on where you live, you will be writing down the names of different people or even different titles. 

2. After you have your list of leaders, split your paper plate into three equal sections.

3. You will cut away one section for the top paper plate. Make sure when you cut away, you leave enough space around your paper fastener hole so it will not tear. 

4. Then, you will use your marker to make lines for each section. 

5. After the sections are divided, write the names of the leaders in the sections. You can add as much or as little decoration to your prayer plate as you want. Decorations can be complicated or just squiggly lines. 


drawing on paper plate; clip art of two people climbing a mountain


6. Add on the top plate, "Today we pray for our church leaders and our ____________."


A Mom's Quest to Teach logo: Crafts: Praying for our Leaders - paper plate with national leaders written on it


7. As you spin the prayer plate, you see the names you have written of your different leaders. Find a specific time during the day to pray for them.

What are the names of your leaders? Who can you pray for today?

Monday, September 5, 2022

Crafts: Shark Sun Catcher

 A Mom's Quest to Teach: Crafts: Shark Sun Catcher; shark clip art with ocean background

This post contains affiliate links. For more information, please see my Terms of Use and Disclosure Policy page. Thank you.

We love making sun catchers in our homeschool from coffee filters. Because they are relatively inexpensive, we have been able to make a variety of crafts from coffee filters over the years to hang in our windows. Today let's make a shark-themed sun catcher! 

Since we will be making a sun catcher today, let's talk about sharks' senses. Sharks have keen senses that help them hunt. From excellent hearing to sensitive eyesight, they can easily seek out their dinner. Sharks can hear low-pitched sounds rather well and their eyesight allows them to see in the dim waters better than we can. The location of the sharks' eyes helps them see in almost every direction. They are also super sensitive to smell and their sense of touch is also developed to help them hunt. 


Materials 


A Mom's Quest to Teach; glue stick, scissors, construction paper, gray markers, coffee filter


Steps 

1. Gather all your materials. 

2. Color the coffee filter with gray markers. 

3. Spray the coffee filter with water to create the effect. 

A Mom's Quest to Teach; coloring a coffee filter gray and spraying a coffee filter with water


4. Cut out the pieces for your shark from the construction paper. 

5. After your coffee filter is dry, glue the pieces onto your gray coffee filter. 

6. Hang your shark in your window.


A Mom's Quest to Teach: Crafts: Shark Sun Catcher; complete coffee filter shark craft; shark clipart


Do You Want to Learn More About Sharks? 

SchoolhouseTeachers.com offers over 400 courses for your homeschool. Included in those courses are All About Animals and Everyday Games. In Crafts: Create a Shark Filled Ocean, I shared about the course All About Animals but if you aren't ready to dive into that particular science course with your first or second grader, you can add in fun shark-themed games using the ones found in Everyday Games.


Everyday Games SchoolhouseTeachers.com class logo


In Everyday Games, you will find lessons for language arts and mathematics using a shark theme. There are addition and multiplication games, as well as games featuring synonyms, antonyms, verbs, nouns, and more! You can print the games out and use them as many times as you want to help your children learn their math facts or their language arts facts.


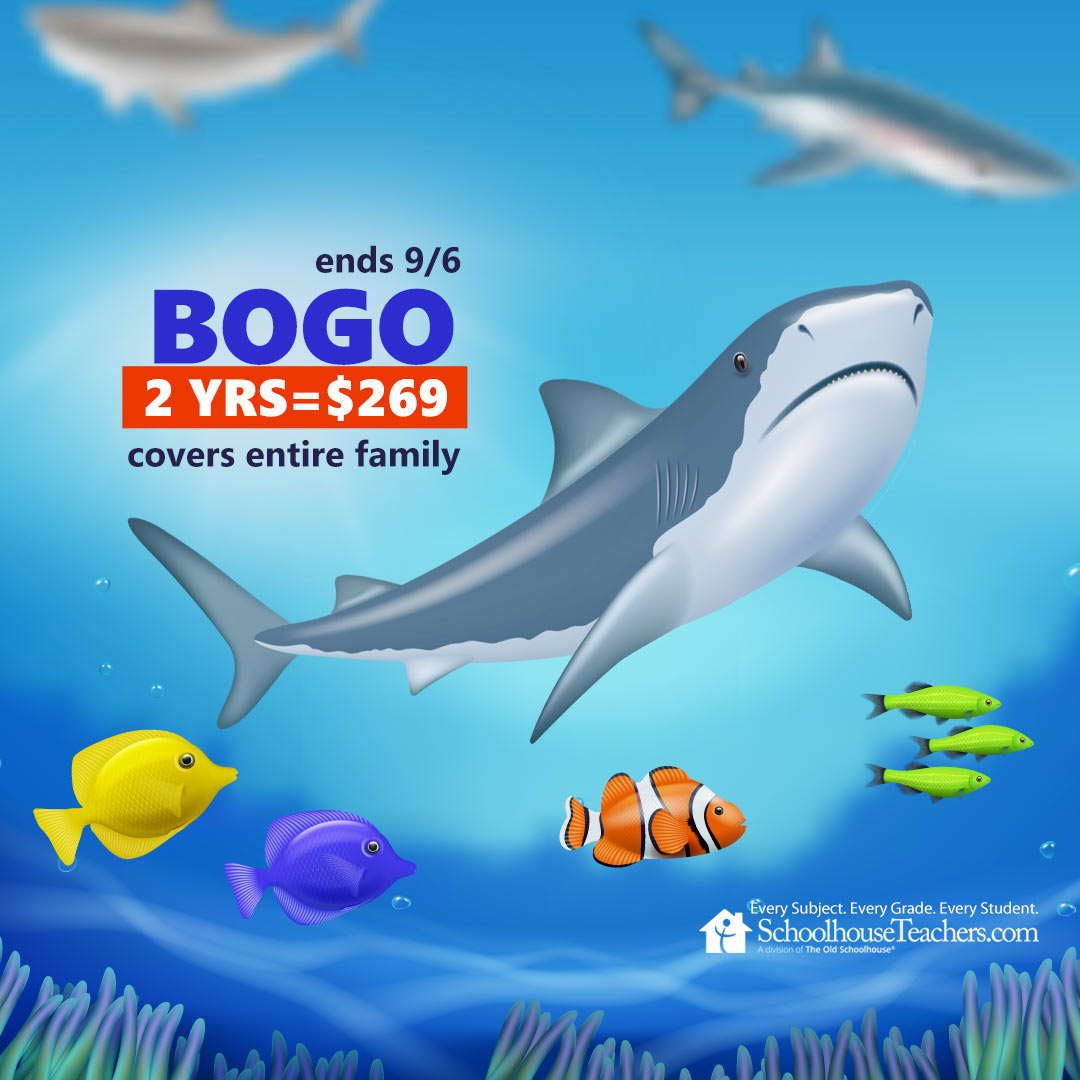
Now Through September 6, 2024! 


Dive into our Shark & Sea BOGO Sale at SchoolhouseTeachers.com! From July 22 to
September 6, buy one annual membership for $269 and get another year free! Did you
know that sea turtles can live up to 100 years? Our courses have the longevity and quality you
need with hundreds of courses available for all grades. Don’t let this deal swim away!


Tuesday, August 30, 2022

Crafts: Shark Painting

A Mom's Quest to Teach logo: Crafts: Shark Painting; Shark photograph in background

This post contains affiliate links. For more information, please see my Terms of Use and Disclosure Policy page. Thank you.

We love painting in our homeschool. So, I am always looking for new ways to incorporate painting into our homeschool day. For this shark-themed craft, I decided we would do something similar to the Father's Day painting we did a few years ago. We created the shape of the sharks as negative space so they would stand out on our paper when we were finished painting.


Materials 

  • Painting paper
  • Paint in a variety of colors 
  • Sponge brushes or cotton balls 
  • Something to hold the paint for dipping the sponges/cotton balls into the paint 
  • Paper for cutting our shark shapes
  • Tape 

paint, sponge paintbrushes, shark clipart, white paper


Steps 

1. Gather all your materials. 

2. Cut out two or more basic shark shapes. 

3. Tape the shark shapes onto your painting paper. 

4. Use sponges or dot paints to paint on and around your shark shapes. 


A Mom's Quest to Teach logo; shark clip art; painting shark painting


5. After the paint is dry, remove the shark shapes to reveal the outline of your sharks. 

6. Hang up your new artwork. 


shark painting


How is a Shark Designed? 

While waiting for your shark to dry, talk about the design of a shark with your children. They have special features which enable them to be fierce predators of the sea. There are over 1,000 species of sharks and rays, so you will have plenty to choose from to discuss. 

Sharks are different from other fish as they have boneless skeletons. They have cartilage in its place to help provide support. The fact that they don't have bones but cartilage also enables them to stay afloat easier as they are lighter. 

The lighter body also helps them in swimming. They are also streamlined to help them move through the water. So many sharks have a torpedo-like shape. They are probably one of the most agile creatures in the sea. 

Fins 

With the variety of sharks, there is also a variety of fins on those sharks. They have a large dorsal fin that helps provide balance. Some have a smaller dorsal fin on their back too. Sharks may also have pectoral fins that help with steering. 


A Mom's Quest to Teach: Crafts: Shark Painting; photo of completed painting with shark clip art


Learn More 


Make another shark-themed craft! Choose from a paper bag shark puppet or a paper plate craft


Red Wagon Marine Biology for High School Course cover from SchoolhouseTeachers.com

Dive into the world of Marine Biology at SchoolhouseTeachers.com with Red Wagon Marine Biology for High School. This high school course is taught with online pre-recorded videos and text instructions to help children learn about the marine world. In addition to studying sharks, students will learn about marine ecosystems, tidal zones, coral reefs, and more. 

And now is the perfect time to become a SchoolhouseTeachers.com member with the BOGO sale! Dive into our Shark & Sea BOGO Sale at SchoolhouseTeachers.com! From July 22 to September 6, buy one annual membership for $269 and get another year free! Did you know that sea turtles can live up to 100 years? Our courses have the longevity and quality you need with hundreds of courses available for all grades. Don’t let this deal swim away!

Sale through September 6, 2024. 

BOGO 2 yrs=$269


Thursday, March 25, 2021

Crafts: V is for Vacation

 Crafts: V is for Vacation; A Mom's Quest to Teach logo; background vacation clipart

This post contains affiliate links. For more information, please see my Terms of Use and Disclosure Policy page. Thank you.

Learning the letters is such an important step for our children. Creating fun ways to reinforce their memory of the letters is one way we as parents can help them on their journey to become well-educated citizens. In this craft, our children used scrapbooking pictures to decorate the letter V to represent an imaginary vacation trip. 

Materials 

Steps

1. Gather all your materials.

scissors, construction paper, glue stick, scrapbook paper


2. Either pre-cut the necessary components or have your children cut the letter and pieces you will need to include on your craft. 

3. Glue the letter onto the construction paper. 

gluing on the letter v

4. Ask your children to pick out the images they will use on their craft. 

scrapbook paper images of trains, planes, suitcases

5. Glue the vacation images onto the letter. 

gluing scrapbook travel images onto a large letter v


6. Display the craft when the glue is dry. 

Crafts V is for Vacation A Mom's Quest to Teach; V craft; suitcase clip art


You can easily tie this craft into a discussion of an upcoming vacation or looking through vacation photographs from the previous year or years. This V is for Vacation craft could also be used as part of a geography lesson where children would pick images from a specific country to place on their letter rather than just vacation-themed ones.  Personally, we love the geography lessons from Let's Go Geography which we reviewed in 2020. 

Friday, March 12, 2021

Crafts: Penguin Paper Bag Puppet

Crafts: Penguin Paper Bag Puppet; A Mom's Quest to Teach Logo; clip art penguin background

This post contains affiliate links. For more information, please see my Terms of Use and Disclosure Policy page. Thank you.

After reading Tacky the Penguin as part of our daughter's kindergarten curriculum from My Father's World, I couldn't help but want to make new paper bag puppets with our children. Our children love making paper bag puppets such as a shark or even Wonder Woman. So, they were very excited to see this new craft endeavor.

Facts About Penguins 

  • Flightless bird 
  • Penguins all live on the southern half of the earth - around Antarctica, New Zealand, along the coast of part of South American, Africa, and Australia 
  • Largest penguins are the Emperor Penguin – they can grow up to 3-1/2 feet tall and weigh more than 90 pounds
  • Smallest Penguins are the Little Blue Penguin – they can grow to about 16 inches tall and weigh less than 2-1/5 pounds
  • Penguins feathers are small and tightly packed together which aid them in swimming 
  • The colors of the penguin – black and white – help it camouflage in the water – the dark top blends in with the dark of the ocean and the white belly blends in with the sky when predators look up underneath it towards the ocean surface 

Crafts: Penguin Paper Bag Puppet; A Mom's Quest to Teach; Penguin craft photo


Crafting the Penguin Puppet 

Materials 

Steps 


1. Gather all your materials. 

2. Paint or color the paper bag using your preferred method. We used Kwik Stix Paint Sticks to paint the paper bags because the paint would dry quickly and allow us to move on to the next step. 

painting a paper bag pink

3. After you have cut out all the pieces for the penguin, you are ready to start attaching the different pieces of construction paper. 

4. Glue on the body or chest of the penguin.

putting glue on white body piece of paper bag puppet penguin

5. Attach the wings to the penguin. 

gluing the wings of the paper bag puppet penguin

6. Attach the feet to the penguin. 

paper bag penguin puppet with wings, belly, and feet

7. Complete the penguin's face with the eyes and beak. 

Penguin paper bag puppet completed

8. After all the pieces have dried, the penguin puppet is ready for a puppet show. 


Tuesday, January 5, 2021

Book Club: Winter's Coming

Book Club: Winter's Coming; snow covered evergreen clipart

This post contains affiliate links. For more information, please see my Terms of Use and Disclosure Policy page. Thank you.

As the seasons change, reading children's books is a wonderful way to introduce new ideas or reinforce previous learning with your children. While painting pictures inspired by Winter's Coming: A Story of Seasonal Change, we read the book written by Jan Thornhill and illustrated by Josée Bisaillon. This is a wonderful book full of unique illustrations that tells the story of a young snowshoe hare worrying about Winter. 

One of my favorite things about Winter's Coming is the fact that throughout the book you see the snowshoe hare, Lily, changing as winter approaches. Her fur is slowly turning from brown – which helped her hide in the first six months of her life – to white which will help her hide in coming winter. 

Lily - the snowshoe hare - talking to the bear in Winter's Coming children's book


Animals to Learn More About 

The book introduces many animals into the story which can you read more about, either in the back of Winter's Coming or below. As Lily, the snowshoe hare, speaks with the different animals, she learns a bit about each animal and how they are preparing for the arrival of winter – but Lily has no idea what Winter actually is. It is not until Lily speaks with the Black Bear that she learns Winter is a season like Summer. Winter won't fly like the birds or have sticky toe pads like the tree frog – it is a season! 

Here are a few of the animals you can study about with your children: 

  • Snowshoe Hare 
    • Weighs about two to four pounds 
    • During the winter, their fur turns white, which helps them camouflage with the snow 
    • During the spring and summer seasons, their fur is a brown color, which helps them camouflage with the forest floor 
    • The tips of their ears are black all year round 
  • Grackle and Red-Winged Blackbird 
    • Large black birds with long tails and long legs 
    • Males and females look very similar but males have an iridescent hue to their body and head 
  • Red Squirrel
    • They can be found throughout the United States and prefer living in coniferous forests  
  • Black Capped Chickadee
    • Non-migratory birds and are found year round from New England to the West Coast of the United States 
  • Mosquito 
    • In warm and tropical areas, they are active year-round
    • In cold and temperate areas, they may hibernate 
  • Gray Tree Frog 
    • They are 1.25 to 2.25 inches long (depending on if they are male or female)
    • They live in much of the Eastern United States 
  • Woolly Bear Caterpillar 
    • They have brownish hair in the middle, while black on the front and end segments 
  • Snapping Turtle (Alligator Snapping Turtle)
    • The largest of freshwater turtles 
    • They are almost exclusively aquatic and can stay under water for as long as 50 minutes without needing air  
  • Black Bear
    • The fur of black bears can range from pure white to brown to very black 
    • Adult males are larger (weighing as much as 600 pounds) than females (who average around 200 pounds)
Book Club: Winter's Coming trimmed with green; background clipart of fox, deer, bear and other forest animals; children's painting of a squirrel


How Animals Prepare for Winter's Coming 

The book also introduces the many ways in which animals prepare for the coming the new season – winter. Again, there is a handy short guide in the back of the book which discusses migration, hibernation, and other ideas. Winter's Coming's main character finds herself struggling to understand why the animals are doing different things. Through trial and error, Lily learns that she can prepare for winter like the other animals. She can bury herself under leaves like the Woolly Bear Caterpillar or hide in the mud like the snapping turtle. She has her own way of preparing for the winter. 

Lily does not need to hibernate in the same way that the Black Bear in the story will during the Winter. So, while the Black Bear will spend time in dens hidden in caves, underground burrows, or other locations where they can be protected from the elements, Lily can be active above ground as her fur changes color. 

Create a Winter-Themed Painting 

Materials 

Steps 


1. Gather all your materials. 

paint, paintbrushes, paper


2. Draw your picture. I sketched several pictures based upon the story for our children. 

half-painting picture of a squirrel


3. Paint the picture. 

half-finished painting of a tree during the winter with snow
A tree trunk in the winter


4. When the initial paint is mostly dry, add the snow falling to the picture. 

painting of a brown snowshoe hare