Showing posts with label Art Class. Show all posts

Monday, May 11, 2020

Art for the Whole Family: A Review of Beyond the Stick Figure Art School

Logo of A Mom's Quest to Teach; text: Art for the Whole Family: A Review of Beyond the Stick Figure Art School; image of flower and circles

Disclaimer: I received a FREE copy of this product through the HOMESCHOOL REVIEW CREW in exchange for my honest review. I was not required to write a positive review nor was I compensated in any other way.

For the past several weeks our family has been working through the Beyond the Stick Figure Complete Drawing Course PLUS 3 Bonus Courses together. These courses are offered by Beyond the Stick Figure Art School and can be by everyone in your household. It is designed to be used as a daily program for the homeschool year but we have been working on different parts in a quicker fashion as fits our needs and homeschool style. With over 60 lessons, we can incorporate art into almost every day of our homeschooling week.  

What is Beyond the Stick Figure Art School? 


Working on the premise that famous artists use techniques and skills that they have learned and practiced, your family will learn the very basics of drawing that they then can take with them into more artwork. The person behind Beyond the Stick Figure is Sally who is from England (so expect an English accent while you are learning your art!). She homeschools her children and wants to share her passion for art with other homeschooling families. 

What Are the Courses? 


There are four courses that we have access to for the review: 
    Text: Art for the Whole Family: A Review of Beyond the Stick Figure Art School; Sit around the table and create works of art with your entire family; watercolor picture and drawing with a marker
  • The Beyond the Stick Figure Complete Drawing Course 
  • The Complete Pen & Ink and Watercolor Course
  • Introduction to Acrylic Course 
  • Introduction to 3D Design Course 
The courses focus on techniques that you can use to develop your drawing skills using various materials. In the first drawing course, the short videos are sometimes accompanied with PDFs to download for drawing, tracing, and practice.

There is a list of materials that you will need to purchase before you begin creating your art that is now available before you start looking at any lessons. You can then view specific videos within the courses that show and discuss the necessary materials. (For example, Acrylic Part 2 Materials, you can view the video that shows the paintbrushes, paints, and other items you will need to create a beautiful brown and white lake scene.)

We had to pick and choose which supplies to purchase for the review of Beyond the Stick Figure courses. As our teenager was going to be working on the painting portion of the course with me, we spent the money we allocated to the course on those supplies. In the future, we will purchase the marker set but with the current state of things we were unable to purchase them. We also had to substitute a few other things (like picking a different color paint) due to being able to go to the craft stores and online supplies being limited. (Personally, I don't think using a different color for our watercolor painting was too detrimental.)
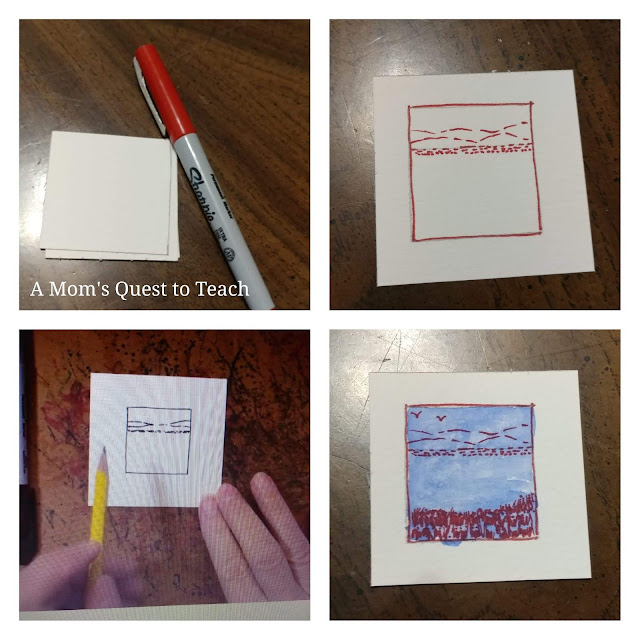
pen and ink watercolor in four pictures (one photo of lesson from online)
The picture was supposed to be drawn with a black fine point sharpie marker but I couldn't find ours anywhere in the house!

How are the courses set up? When you log into the site, you will see that you need to go through each lesson and watch the videos and then mark them as complete. You cannot skip ahead to the further courses (I went through and marked the courses as complete so we can do the different drawing and painting lessons. This was a bit time-consuming.)


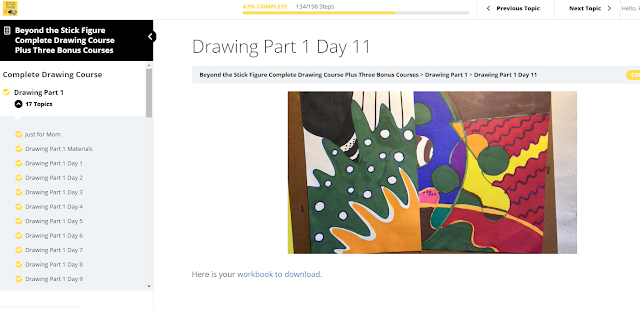
drawing lesson from online
Here you can see the parts of the course are listed to the left side of the screen.
There are a couple of ways to navigate once you have checked off courses as completed. 


But beyond getting the materials you need ready (purchasing or printing out documents) and have accessing to the lessons online, Beyond the Stick Figure Art School can be very easy for homeschooling parents. There is no need to write out lessons or spend time doing the teaching yourself. The instructions are provided in each video.

How Are We Using the Courses in Our Homeschool? 


Our younger children and I are working on the beginning Drawing Courses. There are three parts to the Drawing Course which focuses on the basics of drawing. Our children have been drawing straight lines, curved lines, circles, and dots. They then took those skills and worked on drawing abstract pictures and flowers.

I really like that the children work on 8 x 11.5 papers cut into fourths. It makes it a lot easier to provide them with page after page for drawing as well as being less intimidating, as is talked about in the lessons. (You aren't staring at a huge drawing page that you have to fill.)

four images of drawing curved lines in various stages and from online lessons
For many of the beginning lessons, our children worked on mastering drawing lines and shapes.

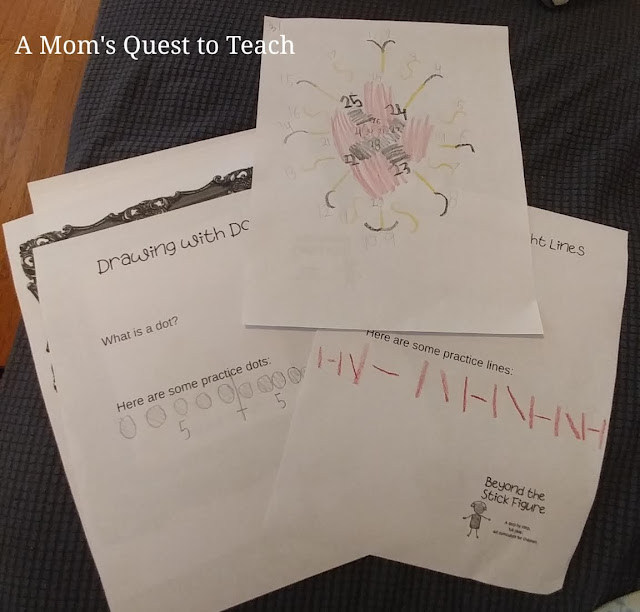
There were also some parts in the early lessons of the Drawing course where children practiced dots, circles, straight lines, and curved lines. We printed out the pages for our younger son to complete included pages that examined primary and secondary colors.

same drawing dots and lines worksheets


I watched and completed the first Pen & Ink drawing myself. I plan on working on the second one from Part 2 but I need to purchase tracing paper prior to completing the tree scene. I also went through and watched the Introduction to Acrylic Course videos.
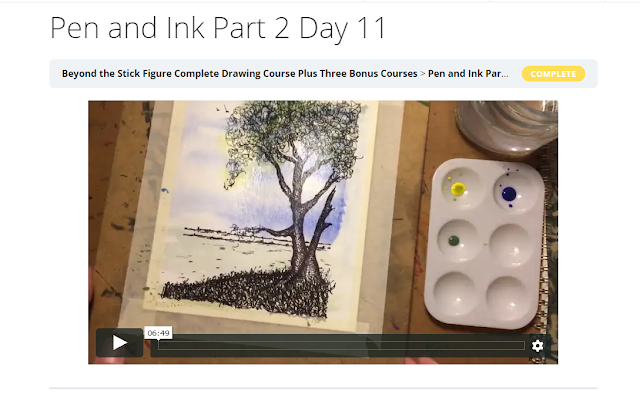

watercolor still frame of online lesson
I am really looking forward to completing this painting. I just need the tracing paper!

online lesson for painting with acrylics
I am looking forward to painting with acrylics. 


At the end of each course, there is a rubric that you can download so you can determine how well you think you did during the course. The rubric focuses upon self-reflection. So, if your children are younger, you may want to complete it with them.

Our teen and I sat down to complete the watercolor course together. As we did not have access to the recommended gray color paint, we each choose a different color to create our small painting. I think I will have fun practicing this painting more and more to get the technique and details to my liking.

two completed watercolor pictures; one practice watercolor picture


What Are We Looking Forward To?


Our teen son and I are looking forward to working with acrylics. This part of the course is in three parts. We have about half of the supplies we need but with the current state of affairs, it has been difficult to get all the materials suggested or needed. I have gone through and watched them. I can't wait till I can start to practice painting a lovely sky, a mountain scene using brown and white, and another lovely countryside scene.

The final course, which we have not started, is on 3D Design. There are three parts to this course. I think our children will enjoy working on this part as they will get to create an animal.

There are a few things that I feel could make the online courses even better that mostly deal with navigation. I wish that the lessons were labeled with more detail. As in Watercolor Part 1, Day 9: Foreground. It would make it easier to navigate back to lessons when taking a break. And while I understand the skills taught in the courses are meant to build upon each other but it is difficult when one child wants to work on art while another is more interesting in painting. We had to go through and click complete on parts of the courses we actually had not finished yet. Perhaps each course could be individual rather than be grouped together.   

The lessons are full of some great advice – including a video just for moms (or dads) that encourages us as parents to not crush the spirit of our children when they are going through the lessons. Another piece of advice I enjoyed hearing was that of not squeezing the paintbrushes in the paper towel. Never thought anything of doing that till watching the videos at Beyond the Stick Figure. I really think everything is presented in a very clear manner to help those who are not used to drawing or working with the different types of paint or clay used in the courses. If you are looking for a beginners course to help you or your children get started as artists, Beyond the Stick Figure Art School will be a great resource for your homeschool.

Do You Want to Learn More?


There were many families who had the chance to review the Beyond the Stick Figure Art School courses. Be sure to check out the Homeschool Review Crew reviews!

Homeschool Review Crew Click Here Logo

Wednesday, May 22, 2019

Virtual Refrigerator: Weekly Art Link-Up


This post contains affiliate links. For more information, please see my Terms of Use and Disclosure Policy page. Thank you.

It's time for another Art Post! 

We would like to extend an invitation to you and your children to share their artwork created while homeschooling. Each month we will host a link-up for you to share your posts about you or your children's art creation.


After you link up, please visit the other blogs and admire what they have shared from their fridges. You might find some inspiration to make a craft with your kids or to paint a new picture.


This week, I would like to share a few treasured pieces that my mom and grandmom made in ceramics quite a long time ago. My mom attended classes with my grandmom and aunt and they all made a number of pieces. 


Cookie Jar 


This never contained cookies at our house but it always held a place of honor on my mom's fridge. 


Christmas Carolers 


These were all up on my grandmom's windowsill and I have had them displayed in my home since her passing. After our younger children were born, they moved from an end table to the top of a bookshelf to prevent little hands from playing with them. 


My grandmom made the carolers while our son made the paper roll tree in the foreground.


Angel 


Unfortunately, my grandmom's angel broke this past year even though I had the wings wrapped and the entire angel wrapped. I think a box was sitting on top of the box where she was stored. I have set her aside to try and fix her. 


She was meant to carry or hold two candles in her hands.


Do you have any treasured art pieces in your home? 


Now it is time for you to link up! Only one more Wednesday left this month. 


You are invited to the Inlinkz link party!
Click here to enter


Tuesday, June 12, 2018

Reviewing ARTistic Pursuits, Inc.'s Art for Children


I received this complimentary product through the Homeschool Review Crew. 

Our family loves art. In fact, our teen has thought about a career in the arts, so we were very excited to review Art for Children, Building a Visual Vocabulary from ARTistic Pursuits, Inc. There are several volumes available in the ARTistic Pursuits Art Instruction Books with DVD and Blu-Ray series including the one we reviewed (Art for Children, Building a Visual Vocabulary). This provided a perfect opportunity to incorporate more formal art lessons into our homeschool day.

Art for Children art book
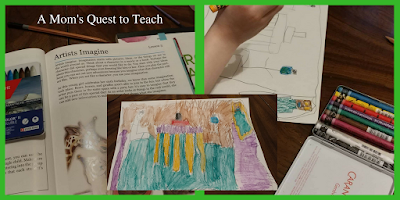
In the first lesson, our sons created drawings of two toys -
a mermaid and a knight using watercolor crayons.

Volume I is written with grades K-3 in mind and provides children with lessons that will build their visual vocabulary. It is suggested that students start with Volume 1 and then there are two options:

  1. Follow history in chronological order through volumes 2-8 
  2. Skip to any volume that features a historical period that interests you and your children
Art for Children, Building a Visual Vocabulary contains a total of 18 projects that your children can create by following along with 12 text lessons and 6 video lessons. The text lessons are laid out with a title, notes for preparation, materials necessary, information, and sometimes master works along with student examples. The video lessons include an overview from Ariel Holcomb and actual step-by-step instructions from Brenda Ellis.

In order to start our lessons, we needed to make some purchases:
  • Watercolor crayon set (which none of the arts & craft stores near us carried so we needed to order online) 
  • Oil pastel set (which was available in each of the arts & crafts stores) 
  • Watercolor paper pad 
We had the other necessary materials since our teen is interested in art and taking an art class in high school. While I knew we would need some supplies, I wish the first lesson would have started with something that only required a pencil and paper as we needed to wait for the arrival of our supplies.


The book is quite beautiful. I would say it is itself a work of art. It is a sturdy, hardcover book that comes with plastic pockets on the front cover for the DVD and Blu-Ray discs. The pages are of great quality and thick. When we lay the book open for a lesson, Art for Children, Building a Visual Vocabulary lays flat with only a bit of pressure. 

Video Lessons 


The art instruction books contain both DVD and Blu-Ray discs so we were able to watch it on both our television and my laptop. The lessons are presented in an easy-to-follow and easy-to-remember format. In fact, each time we have worked with the watercolor crayons, our five-year-old son repeats the tips and instructions from the first video lesson. We are reminded to use the crayons gently, to not use too much water, to move the brush in one direction, and to clean up when we finished our project.

Looking through the book while waiting for the video lesson to start.


Lessons 


Personally, I love that each lesson stresses that our children's completed projects will be unique and look different from the sample projects. Often times, children can feel frustrated that their artwork does not resemble the sample but with this laid out clearly in the lessons, it provides an opportunity to talk about creativity and uniqueness.

Throughout Art for Children, Building a Visual Vocabulary, there are discussions of what the arts are, how to compose, and how to observe, texture, shape, and form. I would have liked to have seen a separate glossary with some of these terms – perhaps to accompany the well-laid out objectives in the back of the book. 

Our son using watercolor crayons to draw his birthday party complete with Minecraft guests.

In addition to completing projects with our five-year-old and three-year-old, our teen participated in some of the projects – as did my mother, my husband, and me. We all liked the video instruction and the text instruction. 

Creating our art projects using the Construction Paper: Cut Lesson and video # 3.

During the review process, we completed six of the 18 projects including: 
  • Introductory lesson to watercolor crayons with the first video lesson 
  • Artists Compose using watercolor crayons 
  • Artists Imagine using watercolor crayons 
  • Identify and Mix Colors with video lesson number 2 (my children wanted to watch this lesson multiple times!) 
  • Construction Paper: Cut with video lesson number 3 where we saw how Brenda created a landscape with construction paper, scissors, and glue
  • Introductory lesson to oil pastels with the fifth video lesson 
Our son's watercolor crayon drawing of our house, from Lesson Two.

Art for Children, Building a Visual Vocabulary introduces children to several artists and master artworks including:
  • The Birthday (1915) by Chagall
  • Flower Day (1925) by Rivera 
  • The Sunflower (1906-1907) by Klimt
  • Our son's car drawing using oil pastels and following the
    instructions from Lesson 11 and Video #5.
  • Blue Dancers (1898) by Degas 
In the final lesson, children are taken through the steps to drawing a self-portrait using oil pastels. First you will take a look at Henry VIII by Holbein the Younger, answer several questions about the painting, and then they will draw their own portrait. I can't wait till we get to this lesson and to see how our children view themselves! 


Our five-year-old son and three-year-old daughter have both enjoyed completing the different art projects. In fact, our daughter has thanked me on more than one occasion for "doing art" with her.  
What I also like about Art for Children, Building a Visual Vocabulary is the fact that it is very easy for parents to supplement the art projects and lessons. With the artists included, parents can share other artwork for further examples as well as ask their children to read biographies of the artists. 

In addition to a glossary, I would love a transcript of the videos or a set of instructions to accompany them. As a someone who prefers to read instructions, it would help me be a better teacher for my children.  My only other criticism is that it was very difficult to navigate the Blue-Ray disc. I had difficulty seeing which video lesson was selected. I did not find it any easier to use the DVD with my laptop but I think that is a matter of the program I was trying to use to access the video lessons. 

Even with a few minor difficulties, I would still heartily recommend Art for Children, Building a Visual Vocabulary from the ARTistic Pursuits Art Instruction Books with DVD and Blu-Ray series. In the future, we will definitely be keeping an eye out for other works produced by ARTistic Pursuits, Inc. including Art of the Ancients and Art of the Middle Ages as we love history in our household! 


To learn more please visit: 


To read reviews from the rest of the Homeschool Review Crew, please visit: 


Monday, April 16, 2018

Crafts: Spring Flowers

Tissue paper, kids crafts, preschool

Looking to recycle some of that tissue paper you saved from gift bags? I can't be the only person who tries to fold it neatly to reuse for future presents or for crafts, can I?

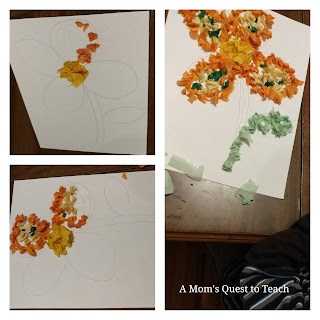
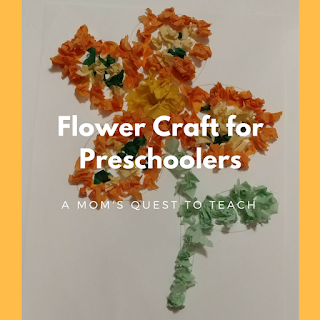
Our children made these two beautiful flowers with tissue paper, construction paper, and glue.

This post contains affiliate links. For more information please see my Terms of Use and Disclosure Policy page. Thank you. 


Materials 
Steps 

1. Gather all your materials.

glue, tissue paper, kids crafts


2. Draw your flower onto your paper. You can draw it like I did or let your children draw it themselves.

3. After choosing the colors for the project, tear the tissue paper into strips and small pieces. Then crumble it a bit before gluing it to the paper.

tissue paper, kids crafts

4. Fill in all the white spaces with tissue paper to create a beautiful flower. 

OR 

If your children prefer our daughter's picture, you can skip the crumbling step and just glue the pieces of tissue paper onto the drawing paper. 

Tissue paper, kids crafts, flowers

Will you create your own spring flower craft with your children? If you share a photograph on Instagram, please use the hashtag #momquesttoteach so I can see it! You can also follow me on Instagram (moms_quest_to_teach).


Tissue paper, kids crafts, flowers


I linked up with the following blog(s):


Monday, March 5, 2018

An Honest Review of The Pencil Grip, Inc.'s 24-pack of Magic Stix Washable Markers


My daughter just *had* to take all the markers out on the very first day. 


One of the principal tools in our box of craft supplies are markers, so I was very excited to review The Pencil Grip, Inc.’s Magic StixWashable Markers with my family. As soon as we received the markers, my kids started using them right away for almost every project. From drawing on scratch paper to completing more extensive craft projects, Magic Stix markers are a fantastic resource.

Unlike other companies, The Pencil Grip, Inc. offers a seven-day guarantee that their Magic Stix markers won’t dry out if you leave the cap off. We completed the seven-day #nocapnoproblem test. I shared each day’s results on my Instagram and here is the completed test. The only changes I noticed were that the colors actually seemed deeper than the first day or two and they had more of a tendency to bleed on the paper than the early days. Neither result would prevent me from recommending them as a great marker. For parents and teachers, this is great – because how many times have you put away markers that look like the cap is on but only find out later it was off enough to dry out the marker? Now you don’t have to worry. (Kwik Stix Paint on Instagram made it to 100 days with the #nocapnoproblem challenge!) After all, who hasn’t found a dried-up marker under the sofa with no cap on it? 


We have completed so many projects over the course of the review period with the Magic Stix markers: My sons made Valentine’s Day cards, my two younger children decorated fire trucks, I used them while Bible Journaling, and all three of my kids colored in some knights. For all of these projects, they were fantastic. The only items with which they don’t work well are the $1 coloring books because the color bleeds through the paper. 


The color will bleed through on cheaper quality paper.
However, the color bleeding through the paper resulted in creating a really neat effect on some knights we were coloring while listening to an audio drama.  


The reverse side of the children's knights.
When we first started using the Magic Stix markers, my two-year-old daughter was determined to draw on herself, her clothes, and the markers rather than on the paper. I am pleased to say that if you draw on one markers tip with a similar shade neither lose their original color. (She used a darker purple shade to color onto a lighter purple shade’s marker tip.) One washing of her hands, though, did not remove the marker from her fingers but that is not uncommon with markers. So, it would not deter me from letting my children use them again and again. On other occasions the marker came off her hands more readily than the first time. Consequently, I would recommend washing hands right away rather than waiting till the craft is completed.


One thing I love about the Magic Stix markers is that they don’t have an odor or smell. I find that when I am coloring I tend to get close to the paper and – with other markers – you might notice an odor as you color but not with Magic Stix. 

One of my favorite crafts to complete with my children is with coffee filters, markers, and a spray bottle of water. In the past, I have used a competitor’s brand of markers but I thought I would try the Magic Stix markers and see how well they blended when sprayed with water. I was very pleased with the result. It looks better with more ink on the coffee filter but I think I would still choose the Magic Stix Washable Markers over other brands for this craft technique in the future.


The Pencil Grip, Inc.’s Magic Stix Washable Markers are a great addition to any family’s craft supplies. They are odorless, non-toxic, and available in 12- and 24-packs of bright, bold colors.


For more information about The Pencil Grip, Inc.'s products, please visit: