Showing posts with label Kids Activities. Show all posts

Wednesday, April 15, 2020

Creating Magic with Djeco Artistic Patch Cosmos

Logos of Timberdoodle and A Mom's Quest to Teach; materials in Djeco Artistic Patch Cosmos kit

Disclaimer: I received a FREE copy of Djeco Artistic Patch Cosmos from Timberdoodle in exchange for my honest opinion. I was not required to write a positive review nor was I compensated in any other way. This post contains affiliate links. For more information, please see my Terms of Use and Disclosure Policy page. Thank you. 

This homeschool year, our first grader is studying astronomy. So, we were very excited to add in some fun and creativity with Djeco Artistic Patch Cosmos. We had the opportunity to review this product thanks to Timberdoodle. They offer curriculum kits which contain a variety of learning materials including puzzles, games, and arts and crafts. 

If you are looking for an arts and crafts activity that does not require anything outside of the box that it arrives in, then the Djeco Artistic Patch Cosmos kit might be a good fit for your family. Everything you need is provided in the box. 


Artistic Patch Cosmos kit box lid


What Do You Get? 


The Djeco Artistic Patch Cosmos kit is packaged in a sturdy box (that is a little difficult to open) and contains the following:


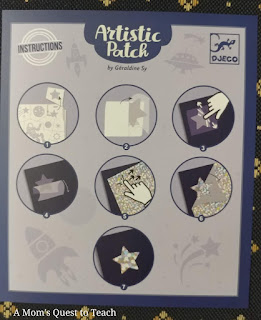
  • One instructions page
Artistic Patch Cosmos kit instruction page

  • Eight sheets with stars, planets, rocket ships, alien ships, and more to create your designs 
Artistic Patch Cosmos kit 'stickers'

  • Ten foil sheets (2 purple, 2 gold, 3 red stars, 3 silver stars) 
foil from Artistic Patch Cosmos kit

  • Twelve sheets with the start of a design printed on them
sheets with space design printed on them

  • A small folder in which you can keep the images and foil
small folder with foil and 'stickers' from Artistic Patch Cosmos; space design on folder


How Did We Use Djeco Artistic Patch Cosmos in Our Homeschool? 

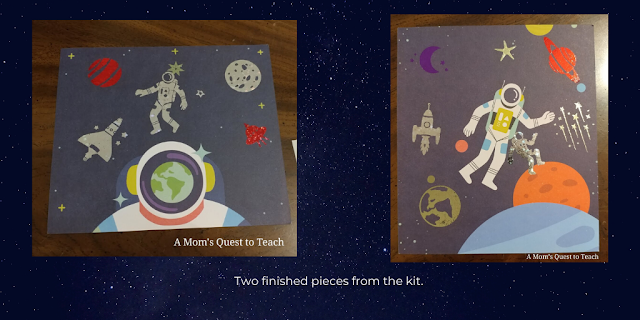
finished Artistic Patch Cosmos design; star clipart, cover of box
With it being spring break week for us, the Djeco Artistic Patch Cosmos kit was a nice way to still talk about our astronomy course while having fun. After breakfast, I sat down with our six-year-old first grader to begin creating his first images using the 'magic glue' and 'magic transfer' process to create 'magic' pictures. We laid everything out on the table to see what was contained in the kit and what his options were for creating pictures. 

After a slight hiccup (I was confused a bit by the instructions), our son created two fun pictures in about 30-45 minutes. He examined the four different options as bases for his creations and then began looking through the eight sheets to pick which images he wanted to transfer onto his picture. There are a great number of options from a variety of stars, rocket ships, planets, and astronauts. 

After picking which image to transfer, I separated it from the sheet (they are perforated and quite easy to separate). He then transferred the image. Next he picked the color foil he wished to use and I pressed the foil onto his picture. 


What Did We Think? 


The materials are all well-made and very intriguing to use to create scenes set in the cosmos. I was a bit frustrated with the instructions because they contain no text. Personally, I need text to help me figure out how to do things. So, I am sad to say I messed up the first image that our son wanted to use because I did not understand that you needed to place the plastic part onto the picture.

Artistic Patch Cosmos project being completed by child
Picking out which shapes to use.
Our six-year-old son really enjoyed the creativity that the Artistic Patch kit afforded him. He was able to pick from eight different sheets of a variety of images to create his final picture. He said that you can see the shape under the clear plastic and see how it changes as the shape becomes attached to the paper. He said he liked the actual transferring of the images. He felt that because you had to transfer the images using the 'magic glue' it was more of a craft than just putting stickers onto a page.

I also like the fact that the kit is not just stickers. The finished product looks so nice since you use the foil pages to make the image appear. My only concern is that as we use more and more of the foil, I am afraid that it will be difficult to finish out the pictures. Will we have enough foil left?

Even with my concern and initial problem, I would recommend the Djeco Artistic Patch Cosmos kit to families who are looking for a fun piece to add to their homeschool day. As the product is for ages 6 to 10, I think that elementary school-aged children will have a fun time using it. A six-year-old could do it by themselves but they might make some mistakes while older children could do it all by themselves quite easily.

The Djeco Artistic Patch Cosmos is a fun inclusion in the First Grade Timberdoodle Curriculum Kit.


two finished Artistic Design Cosmos pictures - space theme


Friday, December 27, 2019

Creating a Dragon: Kid's Handpainting Craft

handprint dragon craft

This post contains affiliate links. For more information, please see my Terms of Use and Disclosure Policy page. Thank you.

I love having our kids create crafts that will provide a remembrance of just how little they were at one time. Making a craft using their handprints provides such an opportunity. For my dungeon master husband's birthday, our kids made dragon cards using construction paper and paint.

Materials

dragon handprint craft

Steps


1. Gather materials.

paper, construction paper, paint

2. Prepare paper, choose colors, and have wipes nearby to clean hands.

3. You can cut out the pieces for the dragon face before or after you paint the body with hand prints. I looked through books and online to find inspiration for the dragon face. You or your children can design it however you want.

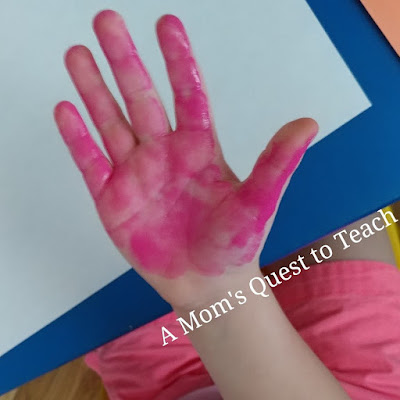
4. Paint your child's hands. Let them paint their handprints on the white paper.

hand painted pink

blue handprint

handprints in various colors

four handprints in different colors

5. Once your handprints are dry, you can attach the dragon head. 

dragon handprint crafts


Rolling Up a Character 


If your children are interested in playing Dungeons & Dragons with you and the rest of the family, there are many different options that will help you get them started on the journey of pen-and-paper role playing. My husband began playing role-playing games (RPGs) around 1981. After 30+ years of administrating and playing RPGs, he recommends folks try rules-light games that are either free or low-cost. The fastest (to learn) and cheapest games he recommends are Basic Fantasy RPG (based on the 1981-1983 iteration of the Dungeons & Dragons rules he learned from, also known as the Moldvay [or more correctly Moldvay/Marsh/Cook] version) and Swords & Wizardry Light (a very streamlined version of the original [1974-1979] Dungeons & Dragons rules). Swords & Wizardry Light can be played "as is" or later graduated from—into Swords & Wizardry Continual Light or the more thorough Swords & Wizardry Complete, which is currently free in its PDF form.

Playing games with your family is a fantastic way to spend time! You can even incorporate games into your homeschooling day if you wish. From simple games for preschoolers like Koala Capers to more complicated logic games like Cats Crimes, you can teach your children many different skills while having fun.


Tuesday, August 20, 2019

Book Club: The Farmer's Away! Baa! Neigh!

photo of book cover and cow clip art

This post contains affiliate links. For more information, please see my Terms of Use and Disclosure Policy page. Thank you.

If your children are learning about farm animals, The Farmer's Away! Baa! Neigh! by Anne Vittur Kennedy is a perfect choice to add to your reading time. Our five-year-old son thoroughly enjoyed reading the book aloud. He examined each of the pictures and imagined what the animals were doing on each page of the book.

Fun book for your young readers! 


Our son's favorite part was where the dog warned the other animals – "Shh!" 

The farmer is returning! 

When the farmer goes away, the animals have a very exciting day. They ride down a lazy river, enjoy a picnic, go on a roller coaster ride, and more—all before the farmer returns. 

Activities 


This book naturally lends itself to making animal noises and sounds with your children. I created a fun Animal Matching Sounds page for you to download free. Why not see if your child knows all the barnyard animals and their sounds?

If your child is a little older, research one or more of the animals from The Farmer's Away! Baa! Neigh! with a free Research worksheet. If you live near a farm you can tour, you might even be able to meet the animal in person!


Create a Mouse


Materials


Steps 


1. Gather all of your materials.


2. Either trace and cut out your shapes prior to getting started with your children or allow your children to trace and cut out their own shapes. You will need four circles of different sizes for the ears and eyes, four long rectangles for the whiskers, one triangle for the nose, and one mouth cut out.

4. Attach the ears.

5. Attach the eyes and then the nose.


6. Attach the mouth and then the whiskers. 


7. Display your child's completed mouse in your house!


Resources 


Download Match Animal Sounds
Download Researching Farm Animals


Looking for other farm animal crafts? 


We have made cute lamb masks, paper plate pigs, and chicks from cardboard rolls.


Tuesday, June 11, 2019

Crafts: Wonder Woman Paper Plate Shield


This post contains affiliate links. For more information please see my Terms of Use and Disclosure Policy page. Thank you.

Since we starting watch the 1960s Batman Television series, our children have really become interested in superheroes like Batman, Superman, and Wonder Woman. Because of this new found love of superheros our daughter requested a Wonder Woman themed birthday party this year so I started thinking about what crafts our children could create to help decorate the house.

We made these Wonder Woman inspired shields with paper plates, paint, and a some clip art from the Internet. 


Materials


Please note this craft will take a while longer due to waiting for the paint to dry in between steps. 


Steps 


1. Gather all your materials.


2. Paint the paper plate red and allow it to dry.


3. Paint a circle of blue on the paper plate. Allow the paint to dry.


4. Print out yellow stars or print out black and white stars and color them in.

5. Print out the Wonder Woman logo and color.

6. Glue on your stars and Wonder Woman logo.


7. Use your shield to defend against evil!


Looking for more crafts?


We made Wonder Woman Paper Bag Puppets and lots of other fun crafts that used paper plates like this one. Be sure to check out our Christmas ornaments, paper plate pigs, and paper plate chicks.


Wednesday, October 24, 2018

Minecraft Birthday: Punch Trees and Party!


This post contains affiliate links. For more information please see my Terms of Use and Disclosure Policy page. Thank you.

Everyone in our family enjoys Minecraft (okay, maybe Dad doesn't enjoy it as much as the rest of us but he will still play the video game with us if we ask). When we asked our soon-to-be five-year-old what theme he wanted for his birthday party, Minecraft was a top choice.

Food


Food and Minecraft decorationsAs our teen had a Minecraft-themed birthday party a few years ago, we wanted to try to serve some different foods this time. Plus – with our 5-year-old's birthday being in June, we were able to grill food outdoors rather than just rely upon indoor cooking like we usually do for our teen's birthday in September.  

We prepared hamburgers and hot dogs for the beef and pork of Minecraft. The other foods in the Minecraft world consist of bread (hamburger and hot-dog rolls), fish (Swedish fish), baked potatoes (potato salad), carrots, and melon (gummy melon candy).

We also had lots of different types of snacks and candies to represent the different ores and other items from the Minecraft game. 

Ores: Lapis, gold, iron, diamond, redstone, emerald, and coal 
Lava and Water: Jello 
Sticks: Pretzel sticks 


Creeper cups and drinks

Treats and Sweets


Sweets and treats

We put together an Enderman Cake and decorated cupcakes like the cake from the game.

Enderman cake
Enderman cake

Birthday cupcake
Cupcakes decorated like the cake (It's a lie!) from Minecraft

Cookies


Decorations


As usual, I like to have the children involved with preparing the decorations for the parties. It provides the perfect opportunity to work on arts and crafts, learn new skills, and cooperate to ensure everyone has a fun time. 


Spider and Happy Birthday Poster
Our teen helped with making a Minecraft Birthday Sign

Minecraft Tools 


Our teen drew the templates for the sword, ax, and shovel and I traced them onto cardboard from boxes and cut them out. Then our two younger children and I painted them along with a few torches to decorate the house. Yes, we could have bought the foam ones but it wouldn't have provided as much fun as painting lots of Minecraft objects on the living room floor! 


Cardboard Minecraft swords, torches, shovelspainting a sword

Minecraft Creatures 


I had been saving old boxes for quite a while in our basement and now was the time to use them! I painted them white and then used both construction paper and plastic tablecloths to create a pig and enderman.

Minecraft Pig

Nether Portal and Photo Background 


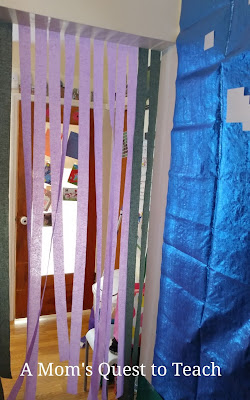
At the entry way to our kitchen, I created a Nether Portal with purple and black crepe paper.

My husband and I used a blue tablecloth, white construction paper, and green construction paper to create a Minecraft backdrop for photos.

Minecraft Nether Portal

Enderman


Other Decorations 


In a previous post, I shared how we created Minecraft Character faces to decorate. We also used Minecraft toys that our sons have gotten as gifts over the years. Our teen and I also created spawn eggs using permanent markers and old plastic eggs


Minecraft character


Games


Creeper Cardboard Minecraft Game


The kids played Creeper Toss with Creeper Spawn Eggs and this giant Creeper Head I made from a cardboard box.

The party was a great hit with our son, family, and friends. I love being able to help our children celebrate with fun parties.