Showing posts with label Painting. Show all posts

Tuesday, November 15, 2022

Crafts: God is Love Painting

 A Mom's Quest to Teach: Crafts: God is Love Painting  - background photo of brushes and paint

This post contains affiliate links. For more information, please see my Terms of Use and Disclosure Policy page. Thank you.


I had the pleasure of designing and creating several crafts for The Canadian Schoolhouse's Virtual Family Retreat: A Purposeful Life. This virtual family retreat is perfect for homeschoolers. The goal is to share about how to live a purposeful life so that you'll gain new insight into God’s plan for your family and your commitment to home education. And the best part? The whole family has a place in this retreat. There are special speakers addressing both homeschooling moms and dads, crafts for your children, and more. 

One of the most important things to remember is that God is Love. Our Father loves us and wants us to be with Him. So, how can we remind ourselves to be loving all the time? How can we be purposeful with our loving? Let's look at the focus quote from day one of the retreat from 1 John 4:7-8. 


"Beloved, let us love one another, for love is from God, and whoever loves has been born of God and knows God. Anyone who does not love does not know God, because God is love." 


Our children's youth program at church says: "Love God! Love Others! Nothing Else Matters!" While this is a very simplified look at what God calls us to do, it is one that is perfect for children. Everything that is important Biblically is tied up in loving God and loving others. If we don't love God, we won't know Him. We will struggle with loving others. 

Today, to help us remember God's love, we are going to create an art piece with paint, markers, painter's tape, and more! So, let's get our materials! 


Gather your materials! Paint, Paintbrushes, Painter's Tape, Paper with pencil and crayon background


Materials 


Steps 


1. After you get your paper, you will need to create the words using the Painter's Tape. You can make the words as small or as big as you want. They just need to fit on the page. If you are letting your children form the words, remind them to take their time as they shape the letters. You don't want white space to overlap the pieces of the tape. There are different ways to form the letters. So, don't be afraid to try different styles.

A Mom's Quest to Teach logo; God is Love created in painter's tape


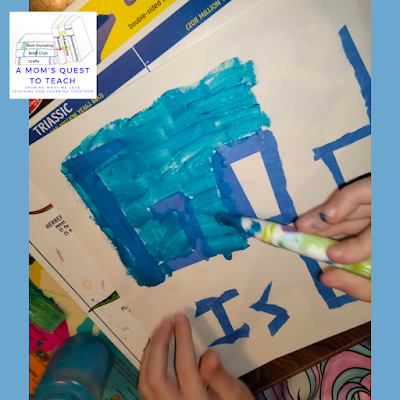
2. Next, paint over the letters. Paint all around them. You don't want to see the edges of the tape. Paint lightly on top of the letters. The harder you push on the letters with the paintbrush, the more difficult it will be to lift the tape. You can paint the whole page or just where the word is. 


A Mom's Quest to Teach logo; God is Love in painter's tape being painted blue


3. Use any color you want. Just maybe not blue, because it does make it hard to see where the paint begins when you need to peel away the painter's tape.

4. When finished, the tape will leave a wonderful white space behind. Your words will really stand out! 


A Mom's Quest to Teach logo: Crafts: God is Love Painting; God is Love with blue paint around it


Where do you think you will hang your finished art piece? 


Friday, October 14, 2022

Crafts: Bear Painting

A Mom's Quest to Teach logo: Crafts: Bear Painting; background photo of forest

This post contains affiliate links. For more information, please see my Terms of Use and Disclosure Policy page. Thank you.

Painting is a favorite pastime for our children. So, I like to find new and creative ways to allow them to paint. From using different materials as brushes like painting with leaves to using handprints, there are many fun ways to paint. We've also experimented with watercolors and using q-tips to paint, too! 

For this painting project, I wanted our children to focus on the background and not the animal they would include in the painting. So, we used a clipart drawing of a bear when the entire painting was completed and dry. 

Materials 


Steps 


1. Gather your materials. 


A Mom's Quest to Teach logo; paint, kwik stix paint, foam shapes, construction paper, paint brushes


2. Decide what color construction paper you and your children wish to use. Do you want to create a nighttime picture, a picture of a polar bear, or one in the forest? 

3. After choosing a piece of construction paper, pick what colors you want to use. Then start to paint your picture. 


two different paintings in progress with A Mom's Quest to Teach logo


4. After the picture dries, put on foam shapes and glue on your bear. 

5. Your picture is ready to hang! 


finished bear painting with A Mom's Quest to Teach logo


More Painting 


If you are getting ready to prepare for winter studies in your homeschool, I've shared a very cute book and a painting craft previously.  In Winter's Coming: A Story of Seasonal Change, your children will see numerous woodland animals. Pick one of the animals in the story and create a painting highlighting the change in the season.

Another fun way to incorporate painting into your homeschool lessons is to paint on a different medium. When we were reading Black Bird, Yellow Sun, we created a picture of the sun and a black bird using beans. After the beans were dry (we glued them on the paper), we painted the beans.


A Mom's Quest to Teach: Crafts: Bear Painting; half painted tree on forest photograph background


Looking for More Painting Lessons and Courses? 


Let's Do Art Outside! SchoolhouseTeachers.com course cover


Why not take a look at SchoolhouseTeachers.com? They offer over 400 courses, including many art courses. With so many schools limiting their electives, including art, homeschool families have the chance to explore art in a great number of ways. They can learn new techniques, study famous artists through history, and explore different mediums such as sculpture, painting, watercolor, and more. As I look through their course offerings, there are currently 19 art-related courses, including: 

  • A Century of Art
  • Achieving Art Success with ArtAchieve 
  • All About Art
  • Art & History: Interconnected 
  • Art: The Timeless Treasure 
  • Art Tips with Jan Bower
  • Digital Art and Product Designs for Small Business
  • Discovering Art History
  • Drawing in Pen and Ink
  • Drawing with Realism
  • Elementary Art 
  • Everyday Easels
  • Exploring the World of Art
  • Inkscape Online Adventure
  • Learning About Art
  • Let's Do Art Outside
  • Preschool: Arts, Crafts, & Music
  • Studio Art for Teens 


Tuesday, January 5, 2021

Book Club: Winter's Coming

Book Club: Winter's Coming; snow covered evergreen clipart

This post contains affiliate links. For more information, please see my Terms of Use and Disclosure Policy page. Thank you.

As the seasons change, reading children's books is a wonderful way to introduce new ideas or reinforce previous learning with your children. While painting pictures inspired by Winter's Coming: A Story of Seasonal Change, we read the book written by Jan Thornhill and illustrated by Josée Bisaillon. This is a wonderful book full of unique illustrations that tells the story of a young snowshoe hare worrying about Winter. 

One of my favorite things about Winter's Coming is the fact that throughout the book you see the snowshoe hare, Lily, changing as winter approaches. Her fur is slowly turning from brown – which helped her hide in the first six months of her life – to white which will help her hide in coming winter. 

Lily - the snowshoe hare - talking to the bear in Winter's Coming children's book


Animals to Learn More About 

The book introduces many animals into the story which can you read more about, either in the back of Winter's Coming or below. As Lily, the snowshoe hare, speaks with the different animals, she learns a bit about each animal and how they are preparing for the arrival of winter – but Lily has no idea what Winter actually is. It is not until Lily speaks with the Black Bear that she learns Winter is a season like Summer. Winter won't fly like the birds or have sticky toe pads like the tree frog – it is a season! 

Here are a few of the animals you can study about with your children: 

  • Snowshoe Hare 
    • Weighs about two to four pounds 
    • During the winter, their fur turns white, which helps them camouflage with the snow 
    • During the spring and summer seasons, their fur is a brown color, which helps them camouflage with the forest floor 
    • The tips of their ears are black all year round 
  • Grackle and Red-Winged Blackbird 
    • Large black birds with long tails and long legs 
    • Males and females look very similar but males have an iridescent hue to their body and head 
  • Red Squirrel
    • They can be found throughout the United States and prefer living in coniferous forests  
  • Black Capped Chickadee
    • Non-migratory birds and are found year round from New England to the West Coast of the United States 
  • Mosquito 
    • In warm and tropical areas, they are active year-round
    • In cold and temperate areas, they may hibernate 
  • Gray Tree Frog 
    • They are 1.25 to 2.25 inches long (depending on if they are male or female)
    • They live in much of the Eastern United States 
  • Woolly Bear Caterpillar 
    • They have brownish hair in the middle, while black on the front and end segments 
  • Snapping Turtle (Alligator Snapping Turtle)
    • The largest of freshwater turtles 
    • They are almost exclusively aquatic and can stay under water for as long as 50 minutes without needing air  
  • Black Bear
    • The fur of black bears can range from pure white to brown to very black 
    • Adult males are larger (weighing as much as 600 pounds) than females (who average around 200 pounds)
Book Club: Winter's Coming trimmed with green; background clipart of fox, deer, bear and other forest animals; children's painting of a squirrel


How Animals Prepare for Winter's Coming 

The book also introduces the many ways in which animals prepare for the coming the new season – winter. Again, there is a handy short guide in the back of the book which discusses migration, hibernation, and other ideas. Winter's Coming's main character finds herself struggling to understand why the animals are doing different things. Through trial and error, Lily learns that she can prepare for winter like the other animals. She can bury herself under leaves like the Woolly Bear Caterpillar or hide in the mud like the snapping turtle. She has her own way of preparing for the winter. 

Lily does not need to hibernate in the same way that the Black Bear in the story will during the Winter. So, while the Black Bear will spend time in dens hidden in caves, underground burrows, or other locations where they can be protected from the elements, Lily can be active above ground as her fur changes color. 

Create a Winter-Themed Painting 

Materials 

Steps 


1. Gather all your materials. 

paint, paintbrushes, paper


2. Draw your picture. I sketched several pictures based upon the story for our children. 

half-painting picture of a squirrel


3. Paint the picture. 

half-finished painting of a tree during the winter with snow
A tree trunk in the winter


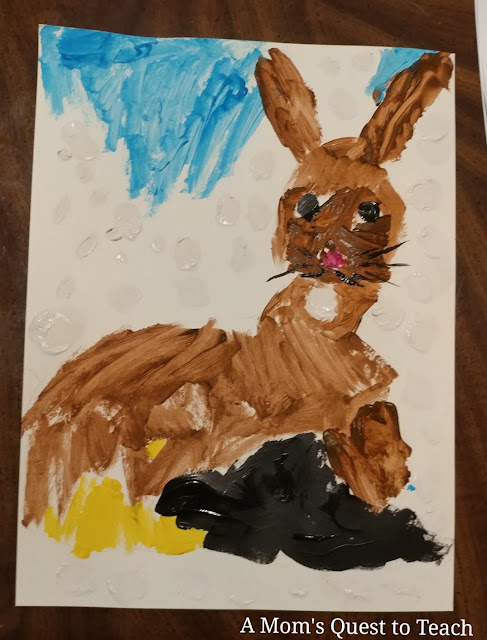
4. When the initial paint is mostly dry, add the snow falling to the picture. 

painting of a brown snowshoe hare


Wednesday, September 9, 2020

Wordless Wednesday: Painting

Text: Wordless Wednesday: Painting; A Mom's Quest to Teach Logo; paint palette with paintbrush clipart; background abstract painting

This post contains affiliate links. For more information, please see my Terms of Use and Disclosure Policy page. Thank you.

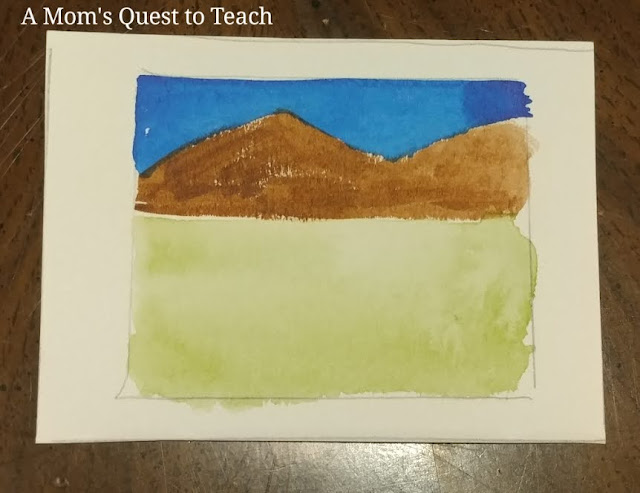
We reviewed Beyond the Stick Figure Art School in May and I have been wanting to use the watercolor paints again. I had a little bit of free time this past weekend so I tried to put some ideas I had onto paper.

5 landscape water color paintings; 1 small tree painting; 1 sun painting

desert landscape watercolor painting

mountain landscape watercolor painting

mountain landscape watercolor painting

text: Wordless Wednesday: Painting; background paintbrush photo from Canva

Thursday, June 13, 2019

Virtual Refrigerator Weekly Art Link-Up


This post contains affiliate links. For more information, please see my Terms of Use and Disclosure Policy page. Thank you.


Favorite Products


What items do you like to keep in your arts and crafts drawer (or box or however you store your supplies)? These are a few of our favorite items.


Crayons


Our children can never seem to have enough crayons. I do find that different brands are better than others. However, I let them keep a mixture of crayon brands in a plastic box. They have access to this box at all times for drawing and coloring.


Colored Pencils


As our two younger children get older, they have been enjoying using colored pencils. They have a basic set they keep in their pencil case and on occasion I let them use the colored pencils I keep for my own projects.


Drawing Paper


Most of the time our kids use scrap paper left over from when I was a high school teacher. I do make sure we have several drawing pads in the house for when we do more sophisticated projects, make cards for family members, or use water colors, Kwik Stix, or other paints.


Kwik Stix


I love these solid tempera paint sticks. The fact that my kids can uncap them to start painting immediately is fantastic. There is no water needed so I do not have to worry about spillage on the table. They also dry almost instantly so they won't be smudging it on their clothes. 


They paint well on paper and wood (we have used them for the wooden masks you can pick up at craft stores).


And if you are concerned about allergies they are nut-, egg-, and gluten-free.


So what crafting items do you always have in your home? Have you found they have changed as your children have gotten older?


Please Join Us!


We would like to extend an invitation to you and your children to share their artwork created while homeschooling. Each month we will host a link-up for you to share your posts about you or your children's art creation.

After you link up, please visit the other blogs and admire what they have shared from their fridges.


You are invited to the Inlinkz link party!
Click here to enter

Tuesday, June 11, 2019

Crafts: Wonder Woman Paper Plate Shield


This post contains affiliate links. For more information please see my Terms of Use and Disclosure Policy page. Thank you.

Since we starting watch the 1960s Batman Television series, our children have really become interested in superheroes like Batman, Superman, and Wonder Woman. Because of this new found love of superheros our daughter requested a Wonder Woman themed birthday party this year so I started thinking about what crafts our children could create to help decorate the house.

We made these Wonder Woman inspired shields with paper plates, paint, and a some clip art from the Internet. 


Materials


Please note this craft will take a while longer due to waiting for the paint to dry in between steps. 


Steps 


1. Gather all your materials.


2. Paint the paper plate red and allow it to dry.


3. Paint a circle of blue on the paper plate. Allow the paint to dry.


4. Print out yellow stars or print out black and white stars and color them in.

5. Print out the Wonder Woman logo and color.

6. Glue on your stars and Wonder Woman logo.


7. Use your shield to defend against evil!


Looking for more crafts?


We made Wonder Woman Paper Bag Puppets and lots of other fun crafts that used paper plates like this one. Be sure to check out our Christmas ornaments, paper plate pigs, and paper plate chicks.


Wednesday, May 29, 2019

Taking a Safari Trip to the Land Down Under – Perfect Summer Learning Opportunities


This post contains affiliate links. For more information, please see my Terms of Use and Disclosure Policy page. Thank you.

Let's continue our Safari Trip in Australia but let's look at some activities perfect for older children.

On this Safari Trip we will learn about native Australian animals and create a piece of artwork to remind us of our journey. Do you have your passport ready? We are about to land in Sydney.

We are going to visit and learn about three different species of species: kangaroos, emus, and the frilled lizard.


Red Kangaroo photo from WPClipart.com


Kangaroo


Probably one of the most famous animals from Australia, next to the Koala (which is not a bear), is the kangaroo – of which there are four species.


  1. Red Kangaroo 
  2. Eastern Grey Kangaroo 
  3. Western Grey Kangaroo 
  4. Antilopine Kangaroo 
  • Mammal 
  • Herbivore 
  • Lives up to 23 years 
  • 6 to 7 feet tall 
  • About 200 lbs. 
  • Their body is designed for jumping with muscles centered in their tail & legs 
  • Like a cow, kangaroos eat grass and have similar broad teeth for crushing the plant fibers 
  • Live in large groups called mobs 
  • A grown male kangaroo is a boomer
  • A grown female kangaroo is a doe 
  • A baby kangaroo is a joey
Kangaroos have few natural predators – just humans and dingoes. They face habitat loss as well. 


Emu 


While there may be 60 different species of flightless birds (most of them being different species of penguins), there are only five that are part of the ratite group of birds. Australia is home to the second largest one – the emu. 


  • 5 to 6 feet tall
  • Omnivore 
  • Long powerful legs to help them run 
  • Can sprint at 30 mph over a short distance
  • Can jump 7 feet straight into the air 
  • Females lay 5 to 15 green-black colored eggs and then leaves the nest
  • Emu eggs are about the size of an avocado 
  • Males makes the nest and then sit on the eggs
  • Dad and the chicks stay together until they are about 18 months old – he protects them and teaches them how to be an emu 
  • Emus can make a very loud drumming sound 
Younger children may enjoy the fictional stories about Edward and Edwina Emus written by Sheena Knowles. 


Frilled Lizard 


Australia is home to a great number of reptiles including 100 venomous snakes. The frilled lizard is often recognizable because of his unique defense tactics. When it feels threatened by a predator, it unfurls its skin flap which opens around his head like a lion's mane and hisses. If this defense tactic does not work, the frilled lizard will turn tail and run away, skin flap still unfurled as it runs.


  • Reptile 
  • Carnivore – eats mainly insects but will eat small mammals and reptiles occasionally 
  • Lives up to 20 years 
  • 3 feet in length 
  • 1.1 lbs. in weight 
  • Males are bigger than females 
  • Lays 8-14 eggs
  • Newly hatched babies are able to take care of themselves right away 

Indigenous Peoples of Australia 


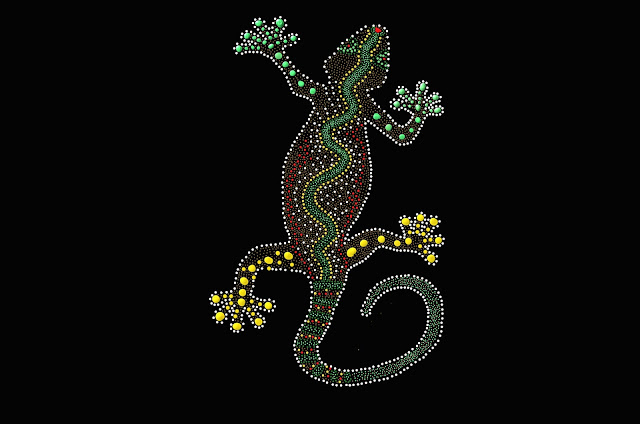
The indigenous or aboriginal people of Australia are considered to be those individuals living on the continent prior to European exploration and colonization. There is a great diversity among the indigenous people which even continues into their artistic contributions. For the purpose of this activity, we will focus upon the 'dot art' of the Central and Western desert. 

Note: As in the case of the tales of many indigenous peoples, there is controversy regarding colonialism and the impact of exploration of the 'Age of Exploration' (1400s-1700s). I recommend parents preview websites prior to sharing with children.


lizard dot art image from diapicard from Pixabay
image credit: diapicard from pixabay

Aboriginal Art 


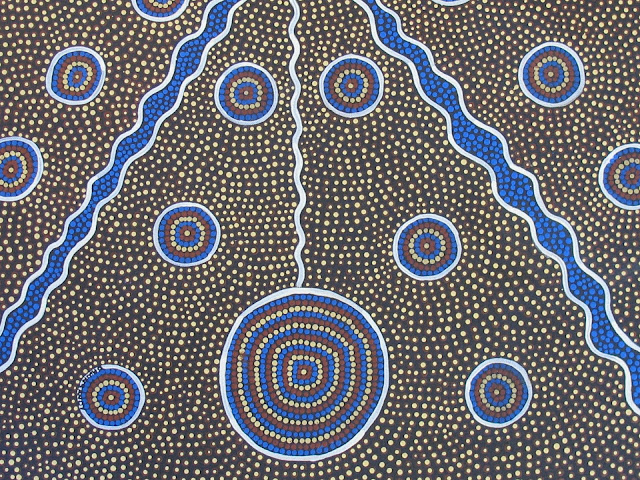
The meaning behind the dot art according to some sources is that Indigenous Aboriginal Art was never supposed to be shared with those outside of specific tribes. So the artwork was modified to make it beautiful but hid the sacred meanings.  In the beginning the the art was drawn and then dots were painted on top of it to obscure the meaning and story. Over the years, the dot artwork has changed and grown as each generation put their own stamp upon it. 


dot art from esther1721 from Pixabay
image credit: esther1721 from Pixabay


The dot artwork is the sharing of approved aboriginal stories and histories. 


Materials 


  • Paint
  • Rounded Paint Brushes (or Q-tips)
  • Drawing Paper 

Steps 


1. Gather all your materials. 


paint and paintbrushes


2. Sketch your image onto your drawing paper. 


These were drawn lightly in pencil so the sketches wouldn't show up in the completed painting as easily. 

3. Paint your image using dots. 

dot art in the process of an emu

dot art in the process of a frilled lizard
Frilled Lizard

4. After your image is dry, hang it up with pride in your house. 


dot art of an emu
Emu

dot art of a kangaroo
Kangaroo


Resources


National Geographic Kids: Kangaroo
National Geographic: Emu
National Geographic Kids: Frilled Lizard
Artlandish Aboriginal Art Gallery: Aboriginal Dot Art 


More Crafts and Activities 


Please be sure to check out the rest of the posts in the DIY Summer Camp Activities Series at Teaching Without Chairs and Preschool Powol Packets. There will be a total of four weeks of fun ideas for preschoolers and older children.


If you are looking for more posts from A Mom's Quest to Teach on animals, please see my posts on how to make a giraffe with construction paper and how to make your own bats. Or if you have preschoolers, why not make some cute Australian animal-themed crafts with them!