Showing posts with label Hand prints. Show all posts

Monday, December 12, 2016

Hand print Christmas Wreaths


This post contains affiliate links. For more information please see my Terms of Use and Disclosure Policy page. Thank you.

Materials


Steps 


1. Gather materials.  Use different shades of green construction paper to trace hands.  You can also use holiday wrapping paper if you wish.  We happened to have some left over plaid paper and I thought that would look nice mingled in with the green hands.

2. Trace Hands.  If you use a different shade of green for each person in your family, you can label the back so you will be able to identify hands in future years.

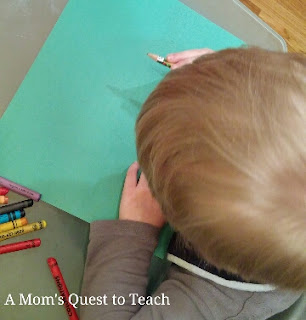
crayons and green paper to trace hands


3. Cut out hand prints.


kids hands on green hand prints


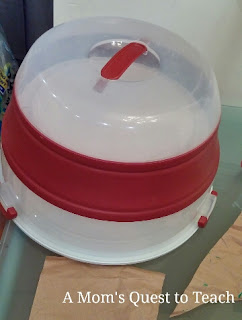
4. Trace circle for wreath. I used my cake saver for my stencil.

cake saver

5. Cut out circle and center of circle to create a base for the wreath.

traced circle for wreath

6. Lay out hand prints in two rows. Adult and teen size on the outside with kid/toddler/baby scattered on top of that row.

7. Tape hand prints down one by one to form a circle.

back of hand print wreath

8. Once all layered hand prints are attached, tape down the smaller hand prints.

front of hand print wreath

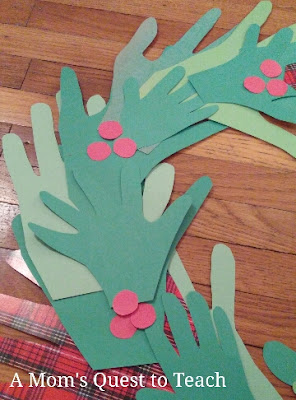
9. Cut out and glue down berries.  (I used my glue stick as a 'stencil.')

berries on hand print wreath

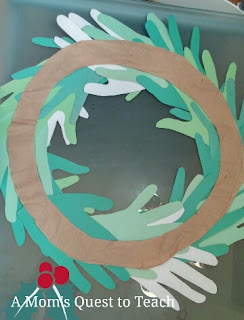
10. Turn over and tape and glue down hand prints so they are all connected on your circle base.

back of hand print wreath on frame

11.  Hang your completed wreath.

Wreath hanging on door

12. Optional Ideas:

  • add year
  • add ribbon
  • add bells 
  • laminate wreath
You will need approximately 15 adult/teen size hand prints and 12 kid/toddler/baby size hand prints. 

I used the same set of prints to trace and make all of my hand prints.  I would have liked a bit of variety of the hand prints but we are so busy that I didn't have time to get everyone to sit around the table and trace their hands multiple times. 

I scattered in the wrapping paper prints because I thought it would add a unique touch as I didn't plan on adding ribbon. 

With all materials and participants at the ready, this entire project will only take a few hours from start to completion. 

I originally saw an image of My Name is Snickerdoodle's wreath last year but I knew that I wanted to put a family twist on this idea.


Friday, July 1, 2016

Crafts: Fourth of July Hand-Print Fireworks


This post contains affiliate links. For more information please see my Terms of Use and Disclosure Policy page. Thank you.

I discovered this really cute idea from Learn Create Love and decided to try it out with my three children. I used construction paper and pony beads we already had on hand.


Materials 


Steps 


1. Gather all your materials.

2. First, I traced my two littles' hands and I asked my stepson to trace his own hands.  Looking back I would trace each child's hands onto different colored paper (red, white, and blue).


3. Then I glued them down onto black construction paper to create a firework effect after cutting them out.  By cutting them out, I was able to trim and shape the hand-prints where my two littles moved when I was tracing them.


4. Then my son glued beads onto them.  We did this instead of glitter because I am not a fan of glitter. It gets EVERYWHERE! 

5. The finished product - all ready to hang up when it dries. 


Do you have a favorite craft to do around the Fourth of July? 


Wednesday, December 16, 2015

Thanksgiving Crafts: Turkey Hand and Foot Print


Turkey hand and foot print
Completed Project
We decided to make ourselves and the grandparents a hand-print Turkey for Thanksgiving from our toddler. I got the idea from various Facebook pages and Pinterest Pins.

Considering last Christmas my son did not want any parts of having paint on his hands for a mitten ornament we were making, I was pleasantly surprised at his enthusiasm for this project. 

I painted his hands different colors using a cotton ball and finger paints. We also painted his foot brown to make the body of the turkey. Afterwards, I let him paint some Thanksgiving pictures with the cotton balls since they still had paint left on them. 

He loved every minute of it. The end project turned out great. I can't wait to try this next year with his sister.


My Son's Blue Hand


   Sharing this post at Timberdoodle's Blog Hop: Celebrating Gratefulness.